Upflowy API Documentation (Sending data to your back-end)
Setup
To send Upflowy data to your database, click on the "Connectors" tab.

An API endpoint will need to be added to the input under "Send data to this URL":
This connection can be set up per step. HTTP headers can be added but are not mandatory.
Async - ON: What it means:
By default, the 'Async' is turned on in Upflowy. This means that the users can instantly go to the next step without waiting for a response from your back end.
Async - OFF: What it means:
The Async off means that when the user submits information, the data from that step will be sent to your back-end and waits for a response to be sent back from your database. Once information is received, the flow will proceed to the next step. This means you can receive data from an external source and have that data called or displayed in the subsequent steps.
Data structure
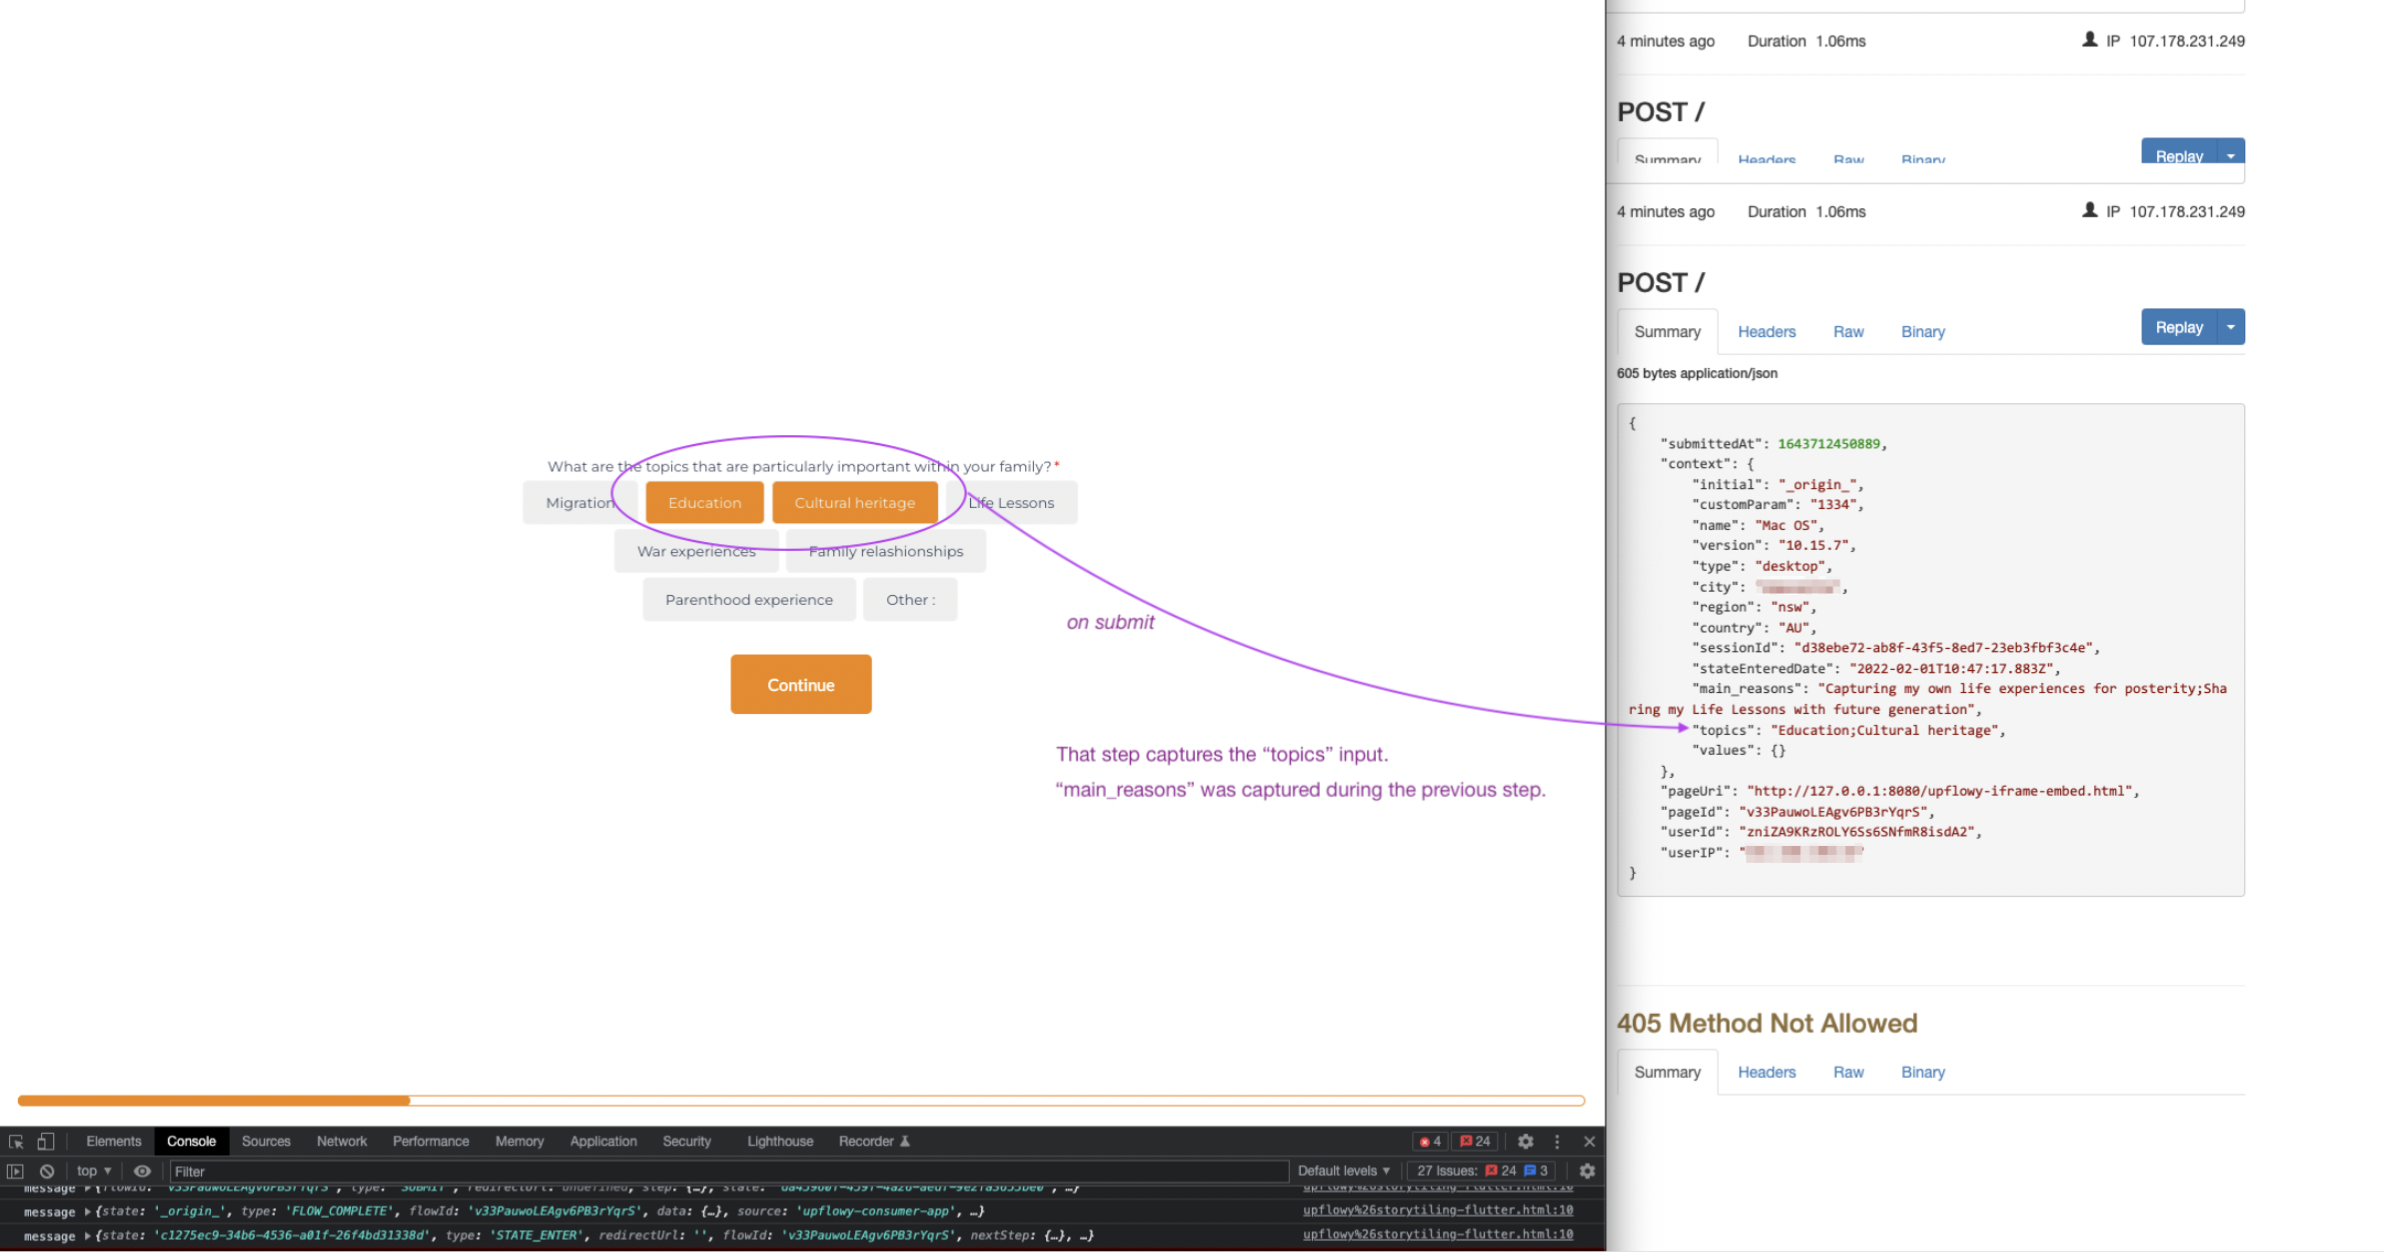
To set up the API data structure, Let's take a sample flow and see how the data is captured for that step in Upflowy:

The above screenshot shows how Upflowy data will be sent. This will be affected by the information requested by the components in the flow (in this example, 'main_reasons' and 'topics' are bespoke questions asked by the flow creator) and a custom parameter ('custom params - more about that here').
All other parameters you see are the 'default parameters' captured when a user submits this particular step.
Using the below 'default parameters obtained from Upflowy and some parameters that you create based on the questions asked in your flow, you can create your API and set up the data connection in the 'Connectors' tab in your Upflowy Flow.
{
"submittedAt": 1643712450889,
"context": {
  "initial": "_origin_",
  "name": "Mac OS",
  "version": "10.15.7",
  "type": "desktop",
  "city": "redacted",
  "region": "nsw",
  "country": "AU",
  "sessionId": "d38ebe72-cd9e-43f5-8ed7-23eb3fbf3c4e",
  "stateEnteredDate": "2022-02-01T10:47:17.883Z",
  "main_reasons": "Reason 1;Reason 2",
  "topics": "Education;Cultural heritage",
  "values": {}
 },
"pageUri": "http://111.0.0.1:7070/upflowy-iframe-embed.html",
"pageId": "v33PygjlLEAgv6PB3rYqrS",
"userId": "zniZA9KRzYMLO6Ss6SNfmR8isdA2",
"userIP": "192.0.2.0"
}
