
Airtable
Follow these simple steps if you would like to
- automatically share sales assets with your visitors, like ebooks,
- create tickets from your feedback form,
- and more!
Advanced Connections are not available anymore. Scroll down to find instructions on how to connect to third-party tools through a webhook.
Navigate to Advanced Connections
To Create Advanced Connections ensure you are on the Edit tab at the top of your screen.
Navigate to the Connectors tab on the left panel. You can manage your connections at the step or flow level.
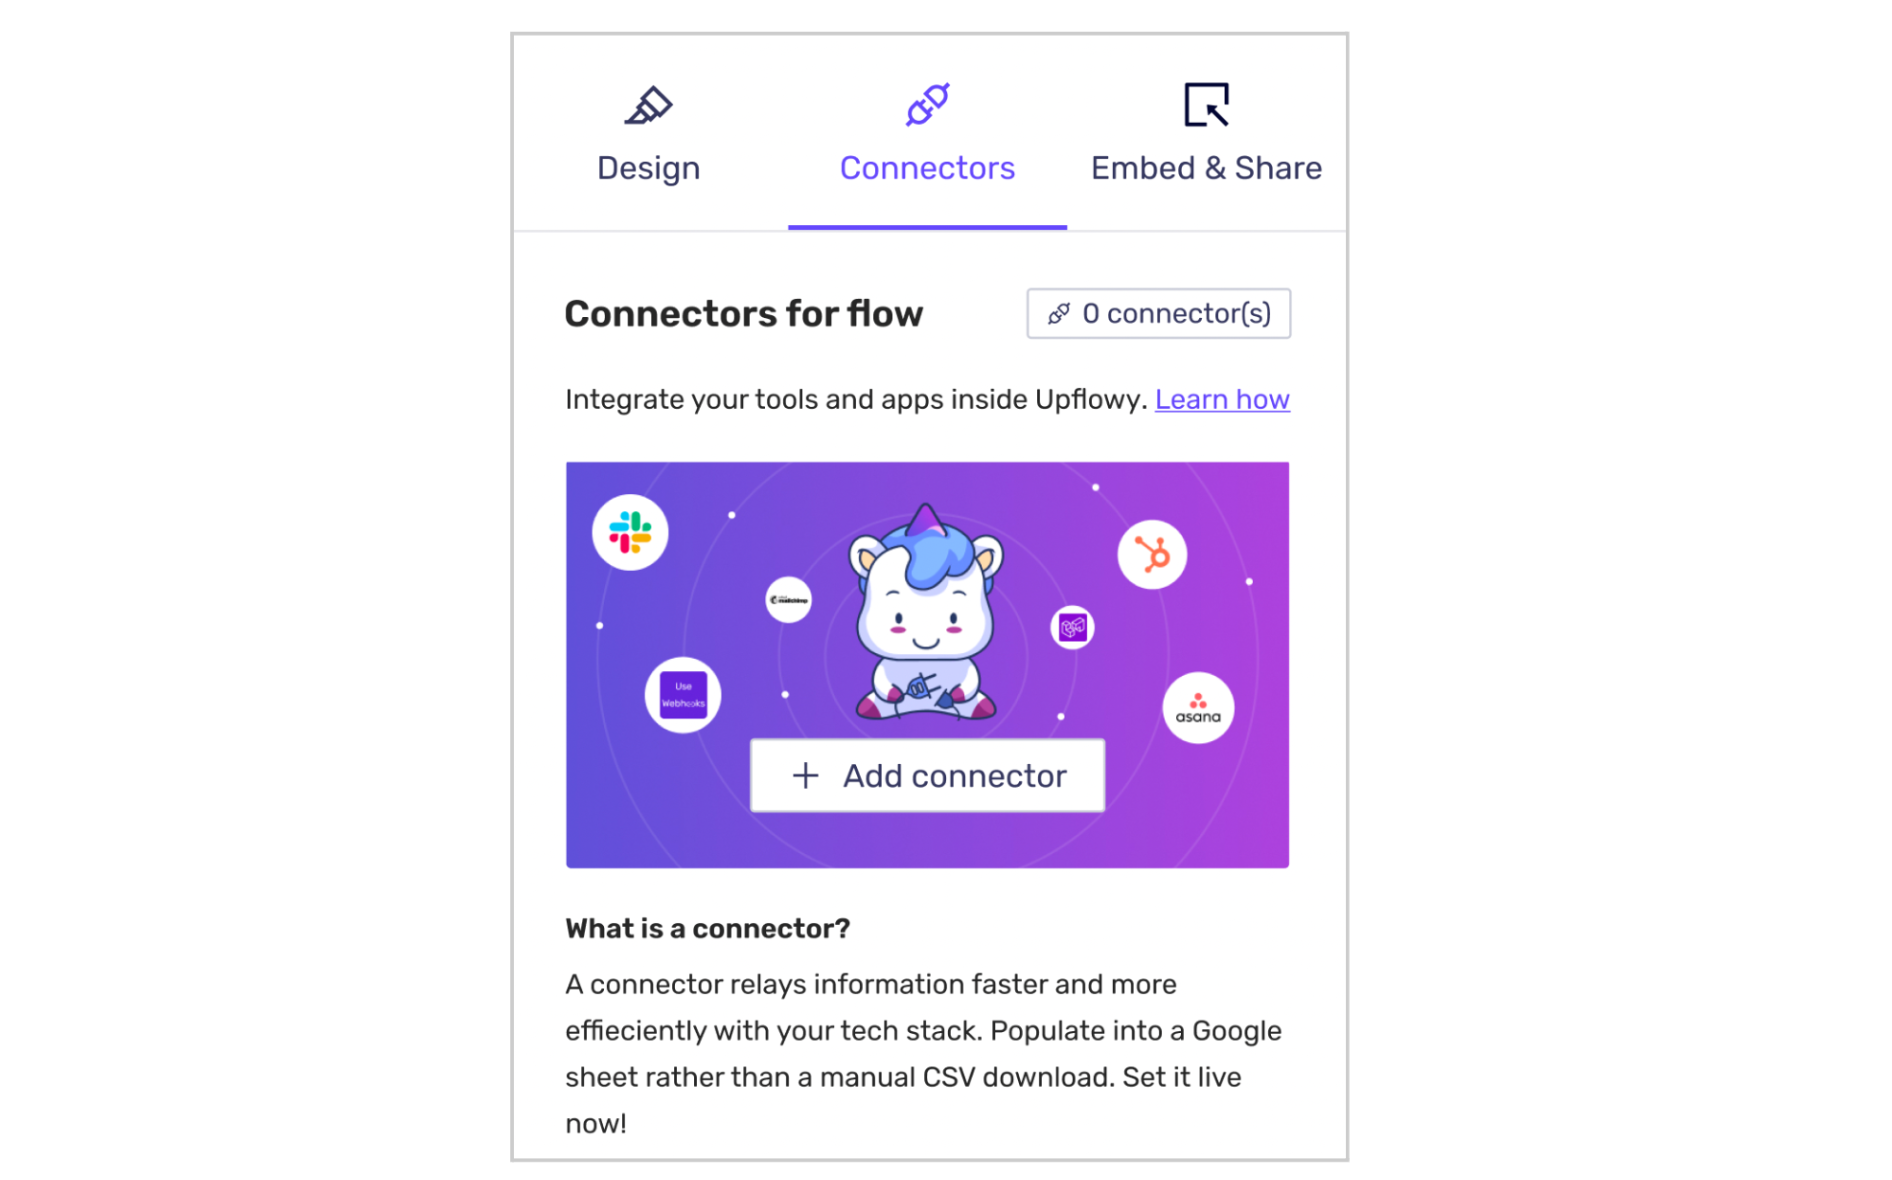
Select the Add connector button and a modal will appear.
Navigate to Create Advanced Connections from either the tab at the top of the card below.
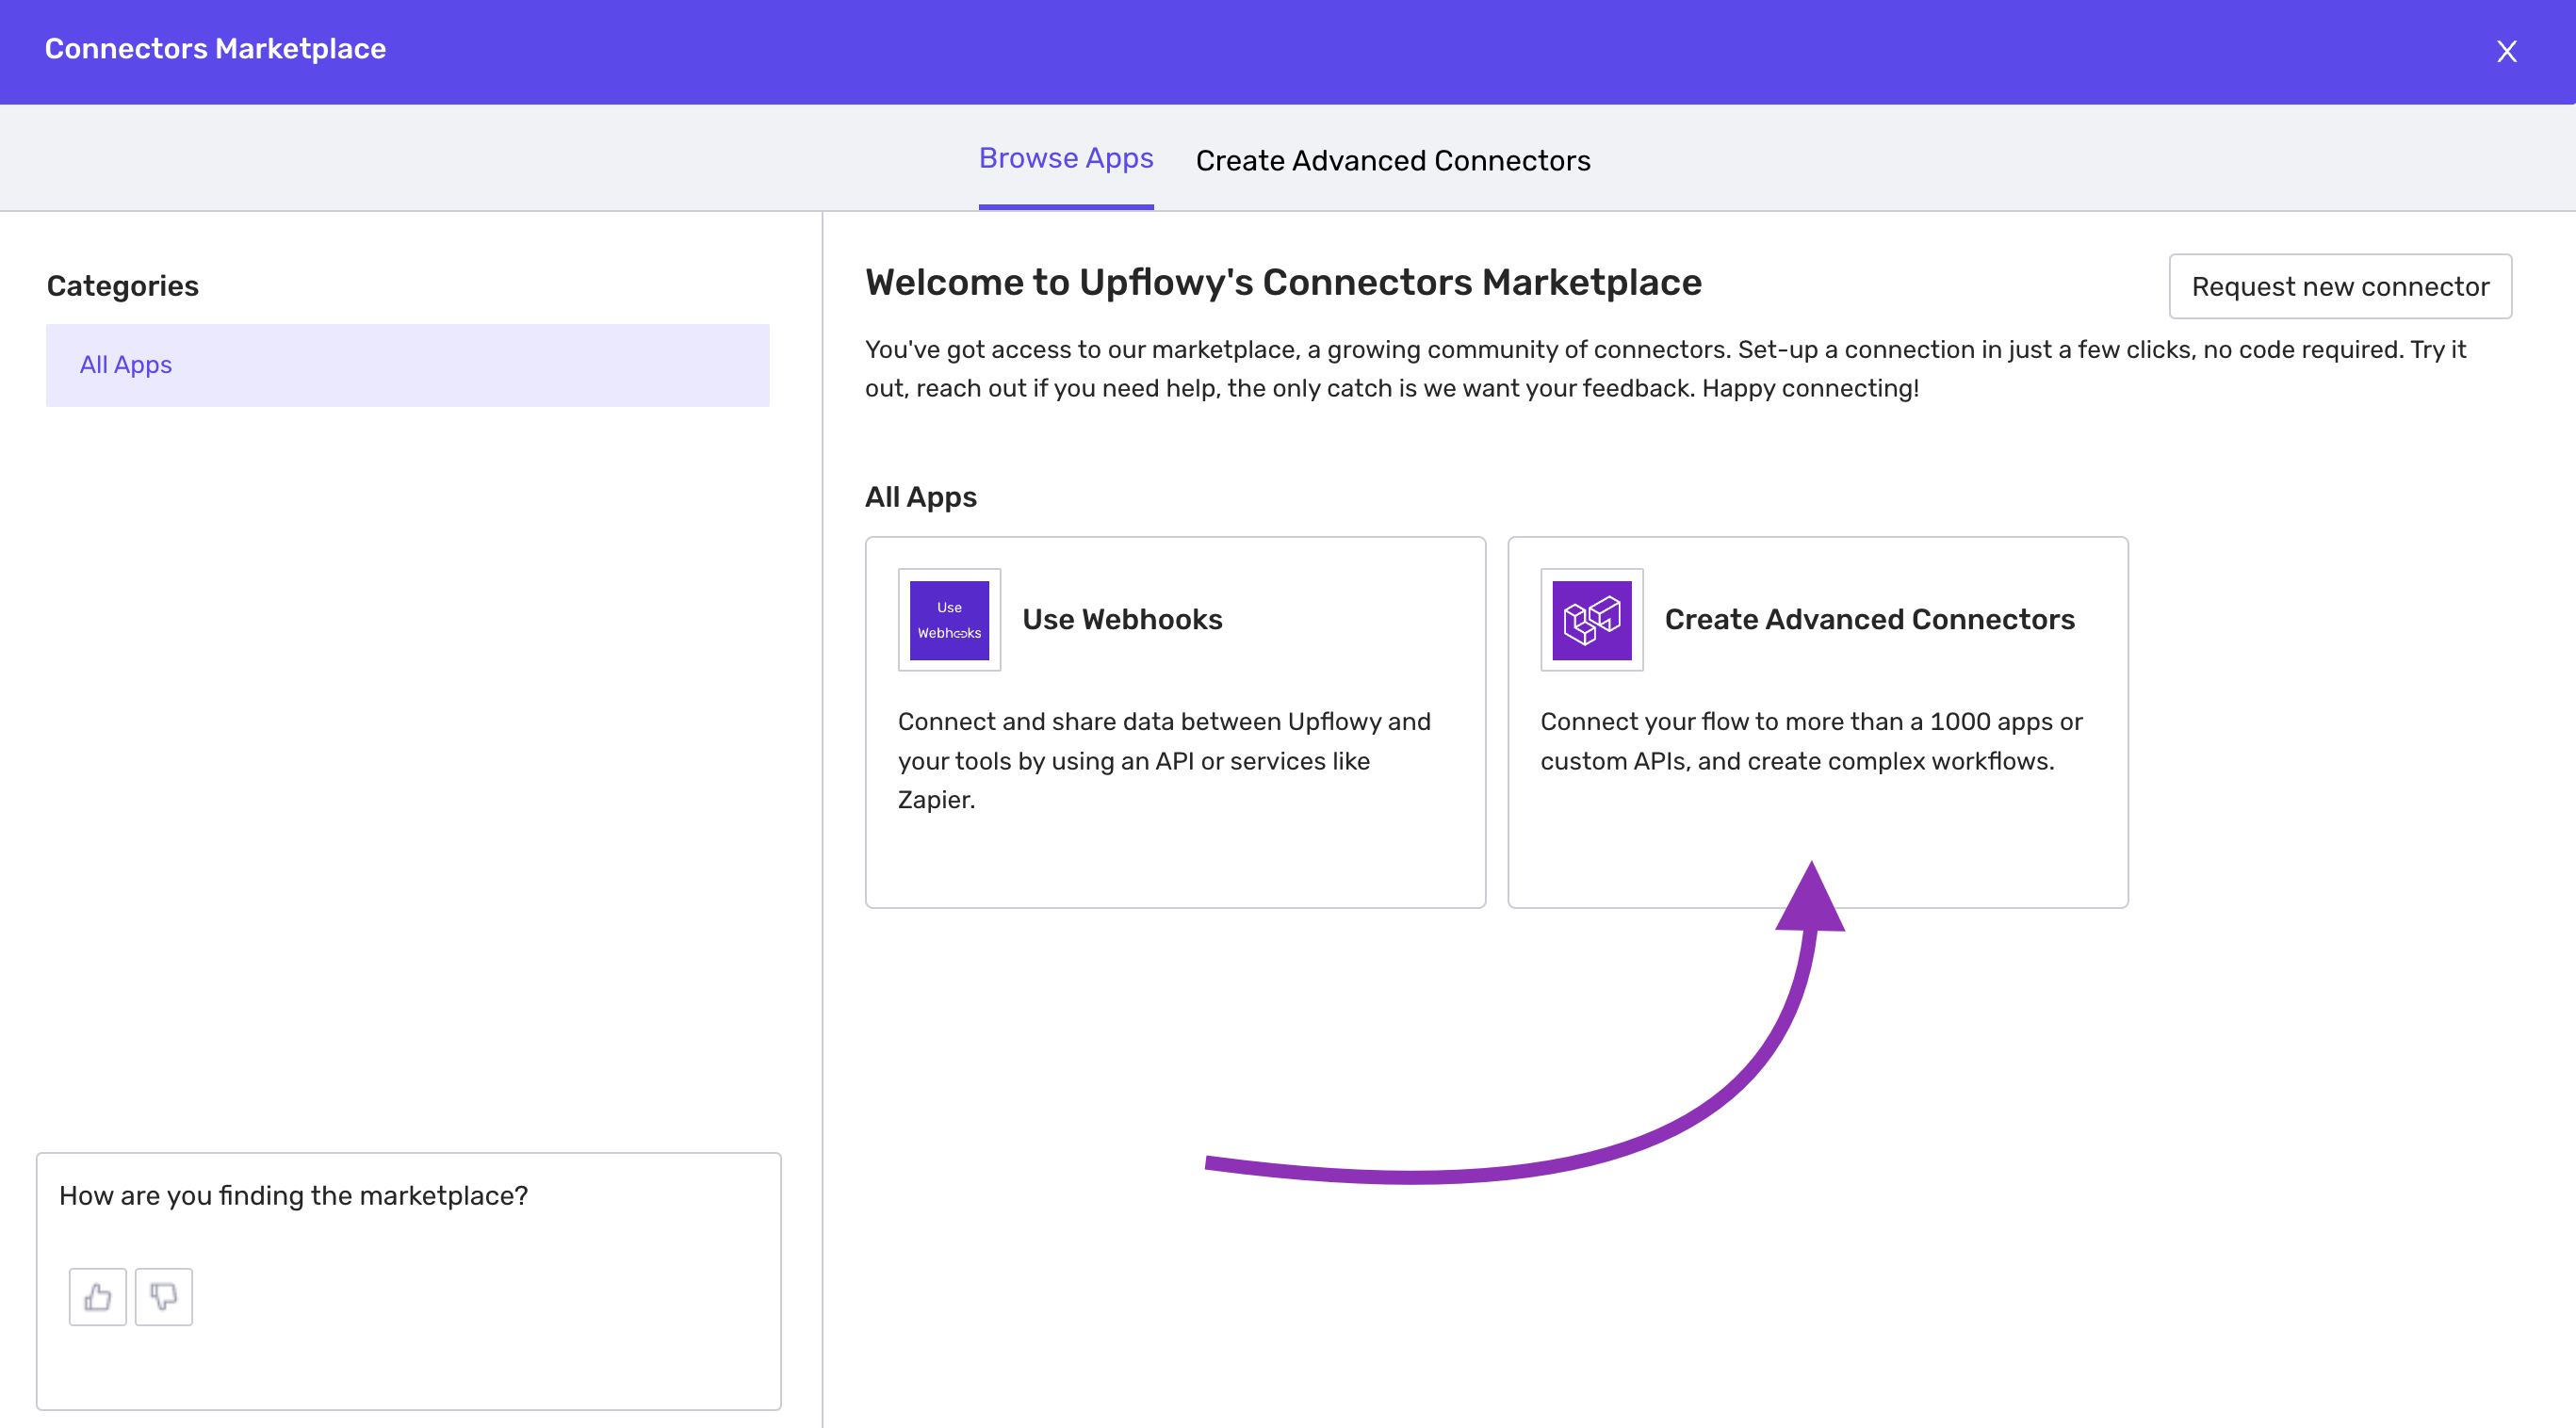
You will enter the details screen for Advanced Connections. Select Create Connection to begin. Note: you need to be granted access to use this feature.
Connect Airtable with Advanced Connections
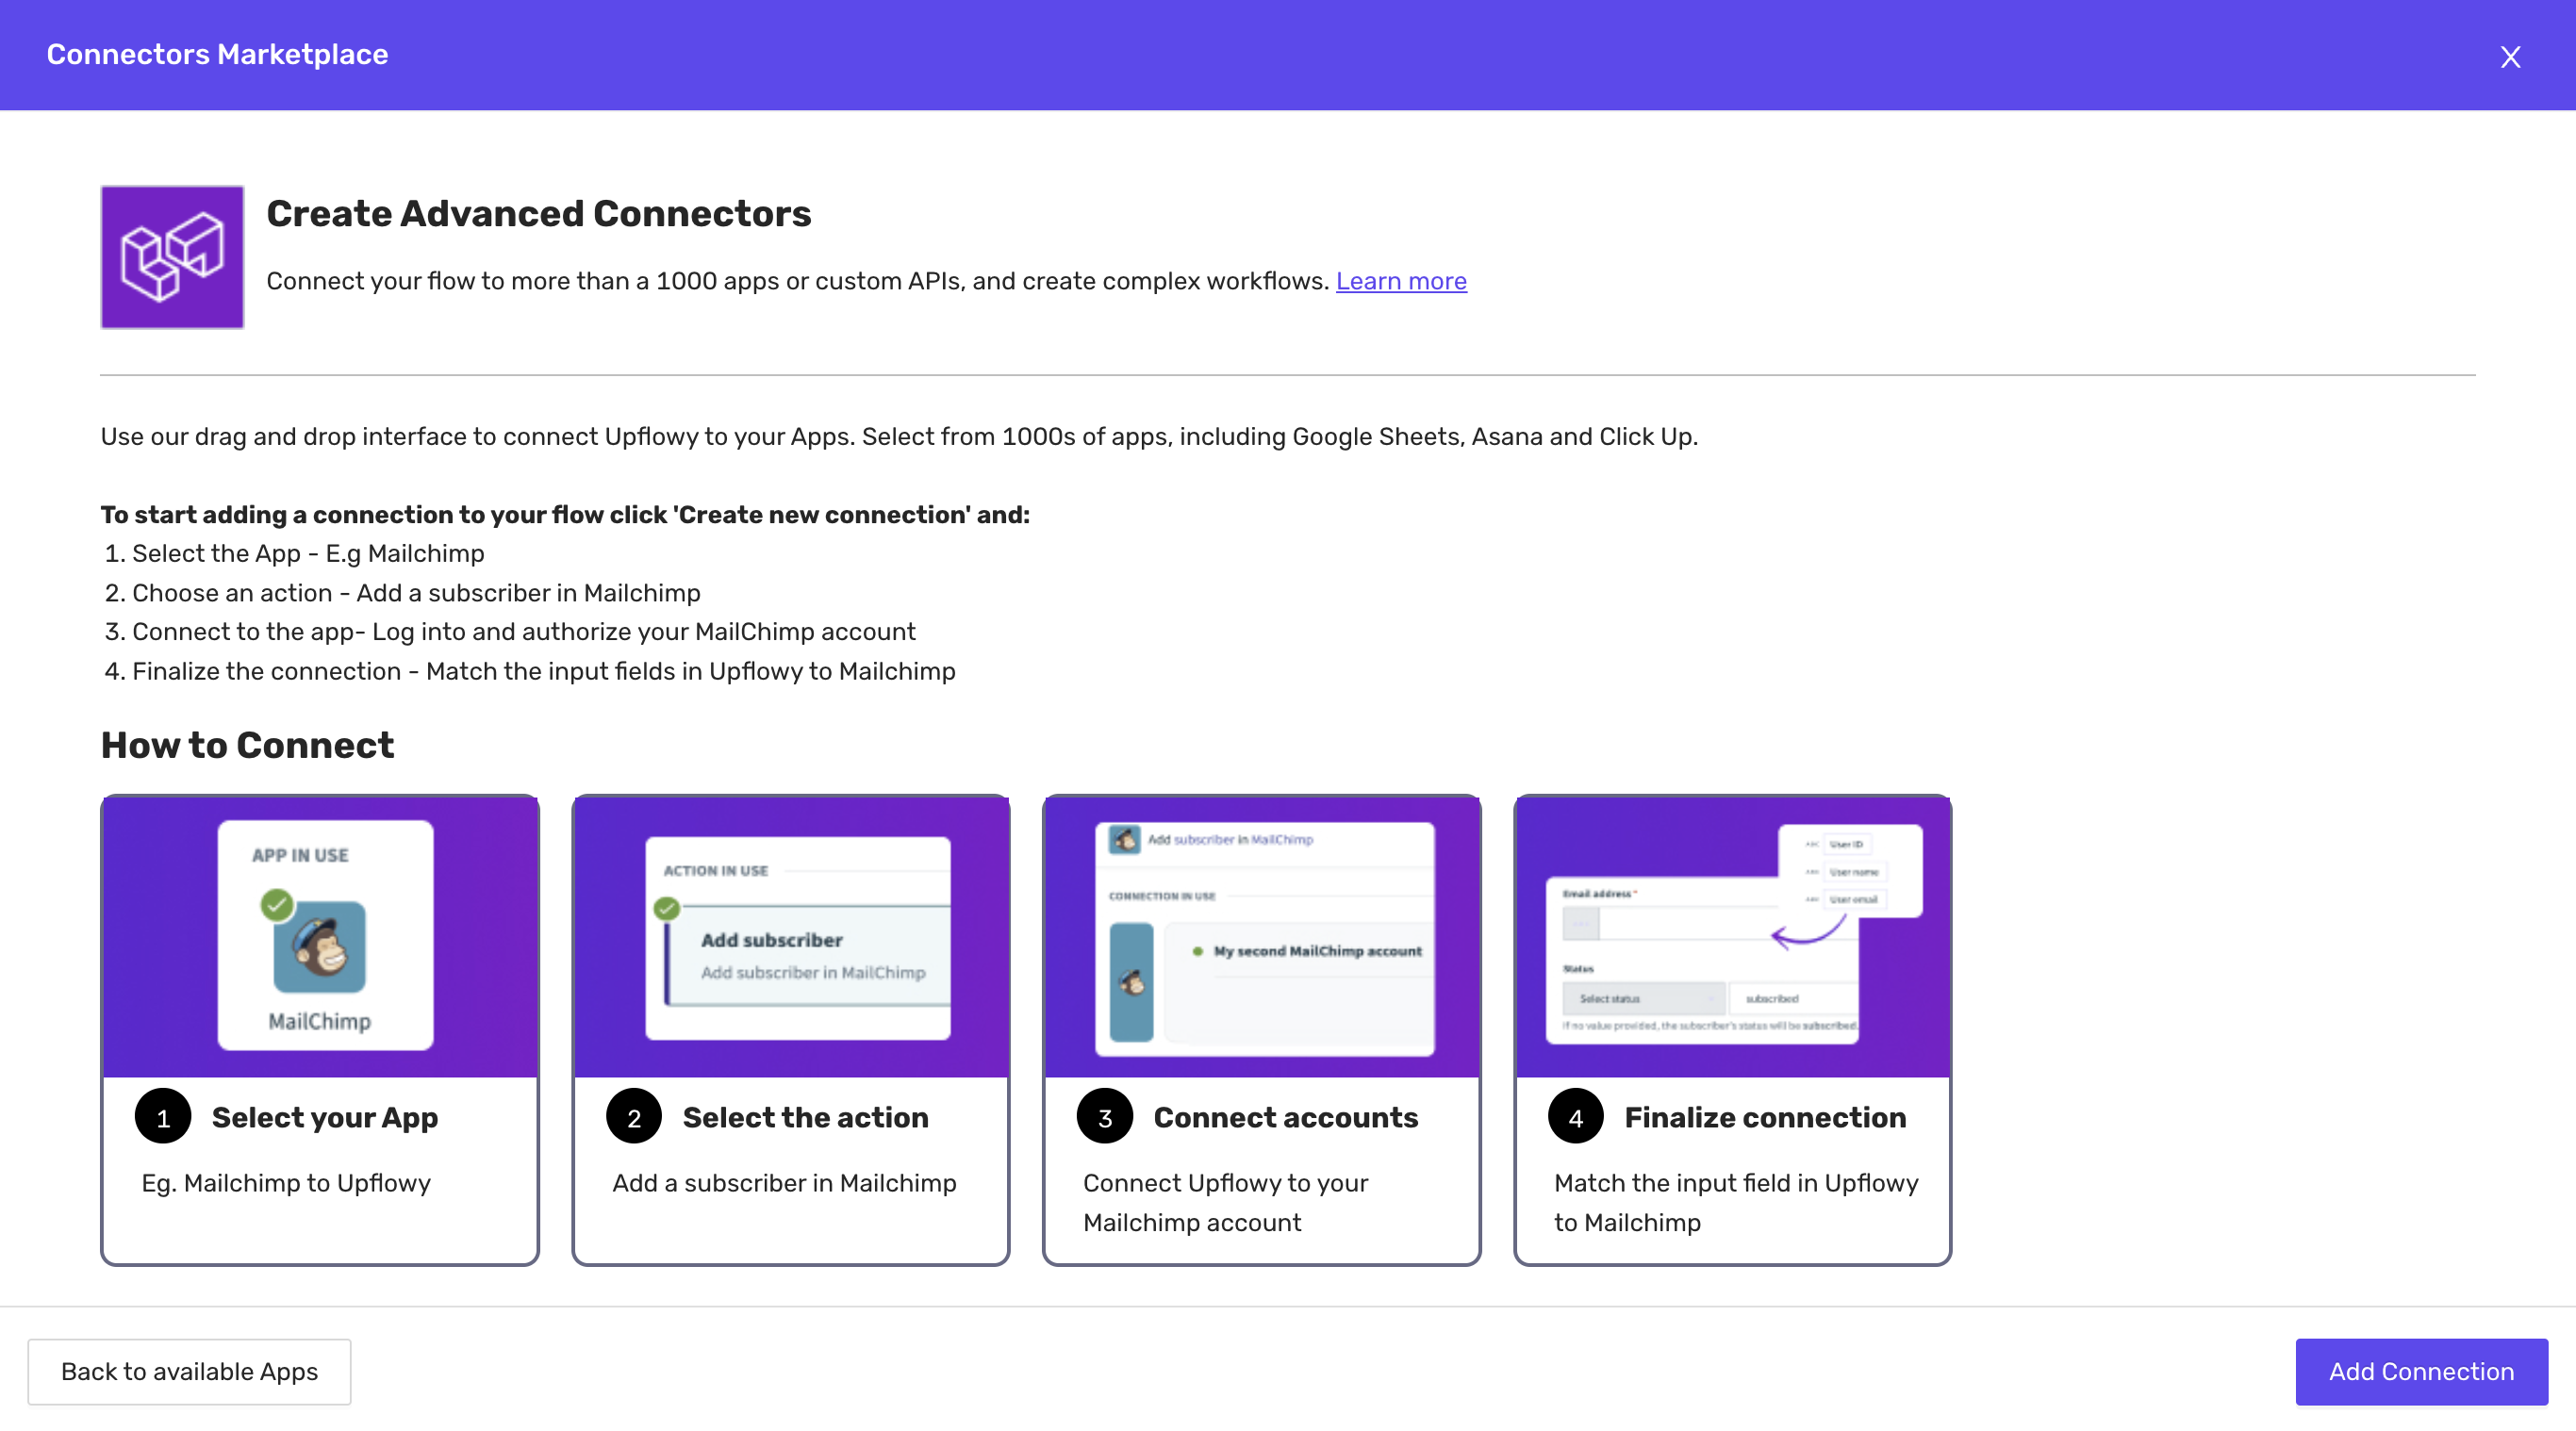
There are four parts to setting up an advanced connection.
Step one: Select your App
Select the plus + button that appears underneath the actions heading. Use this to start building what you want to happen every time a user completes a step or flow. You have multiple options to choose from:
- Action in app
- IF condition
- IF/ELSE condition
- Repeat action
- Call function
- Stop job
- Handle errors
Select Action in the app. From here you will be able to search for the app you would like to connect.
Step two: Choose an action
Select what you want to happen in the app when a user completes a step or flow.
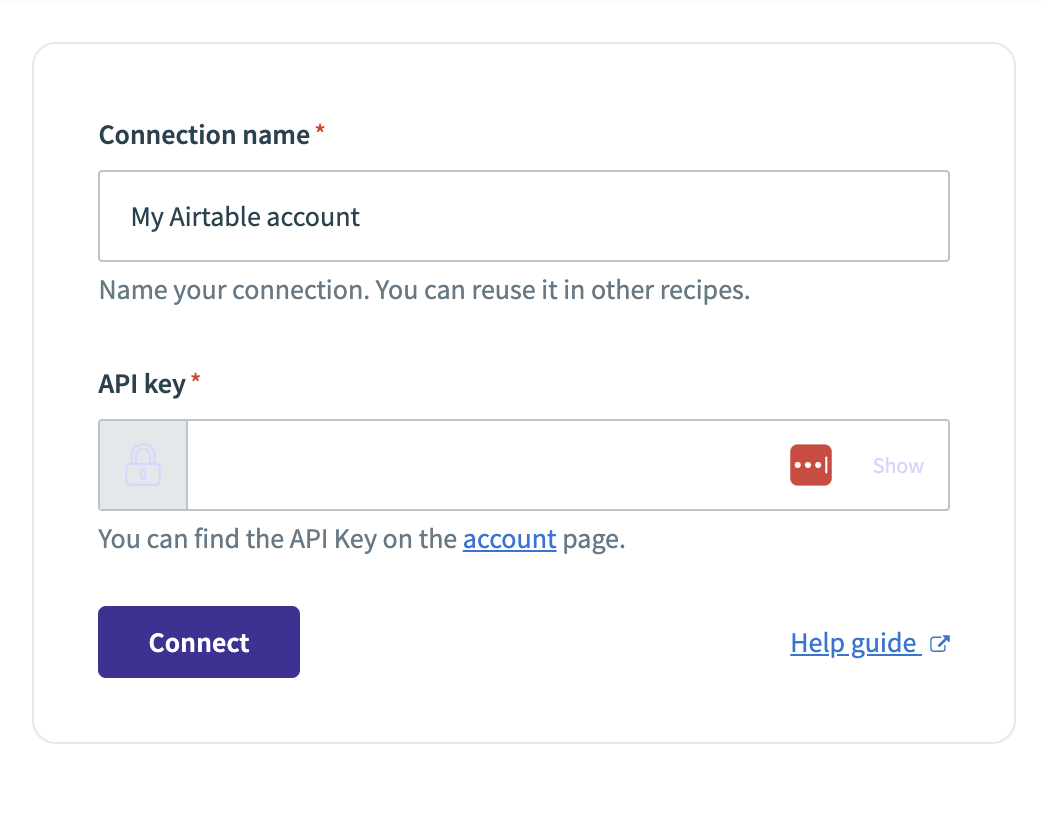
Step three: Connection
Connect Upflowy to Airtable by giving the connection a name, then providing the API key. Note: this connection is only visible for you, and other users cannot access it.
Step four: Setup
Now, all you need to do is customize the settings to achieve the goal you are looking for. This will depend on your specific needs.
To learn more about the API capabilities of Airtable, visit their documentation at the following link.
An alternative way to connect with Airtable: Zapier
You can connect your flow with Airtable through the third-party tool, Zapier as well. For this, you will need to
- Have an Upflowy flow ready to use
- Have a Zapier account
- Have an Intercom account
First off, we'll go into Zapier and set the trigger as "Webhooks - Catch Hook":

You will be prompted to set up the trigger. Copy the custom webhook URL supplied by Zapier:

Now go back to your Upflowy flow, copy-paste that Webhook into the URL input field on the Connectors" Tab, and click "Save":
Then, go into the "preview" mode and run through the flow.

Return to Zapier and select "Test trigger" once you have previewed the flow. If successful, a "We found a request!" message will appear, detailing all of the information from Upflowy.
Great work so far!
Now, let's continue in Zapier and set the action to the one that aligns with your goals. After this, you will be asked to sign in to your Airtable account.
In the next step, connect the Upflowy data with the form by selecting the right data corresponding to the field in Airtable.
Congratulations, you are ready to go! Simply turn the Zap on, and your data collected through Upflowy will pass on to Airtable.