
Clickup
Follow these simple steps if you would like to
- automatically create tasks in ClickUp,
- create tickets from your feedback form,
- and more!
Advanced Connections are not available anymore. Scroll down to find instructions on how to connect to third-party tools through a webhook.
Navigate to Advanced Connections
To Create Advanced Connections ensure you are on the Edit tab at the top of your screen.
Navigate to the Connectors tab on the left panel. You can manage your connections at the step or flow level.
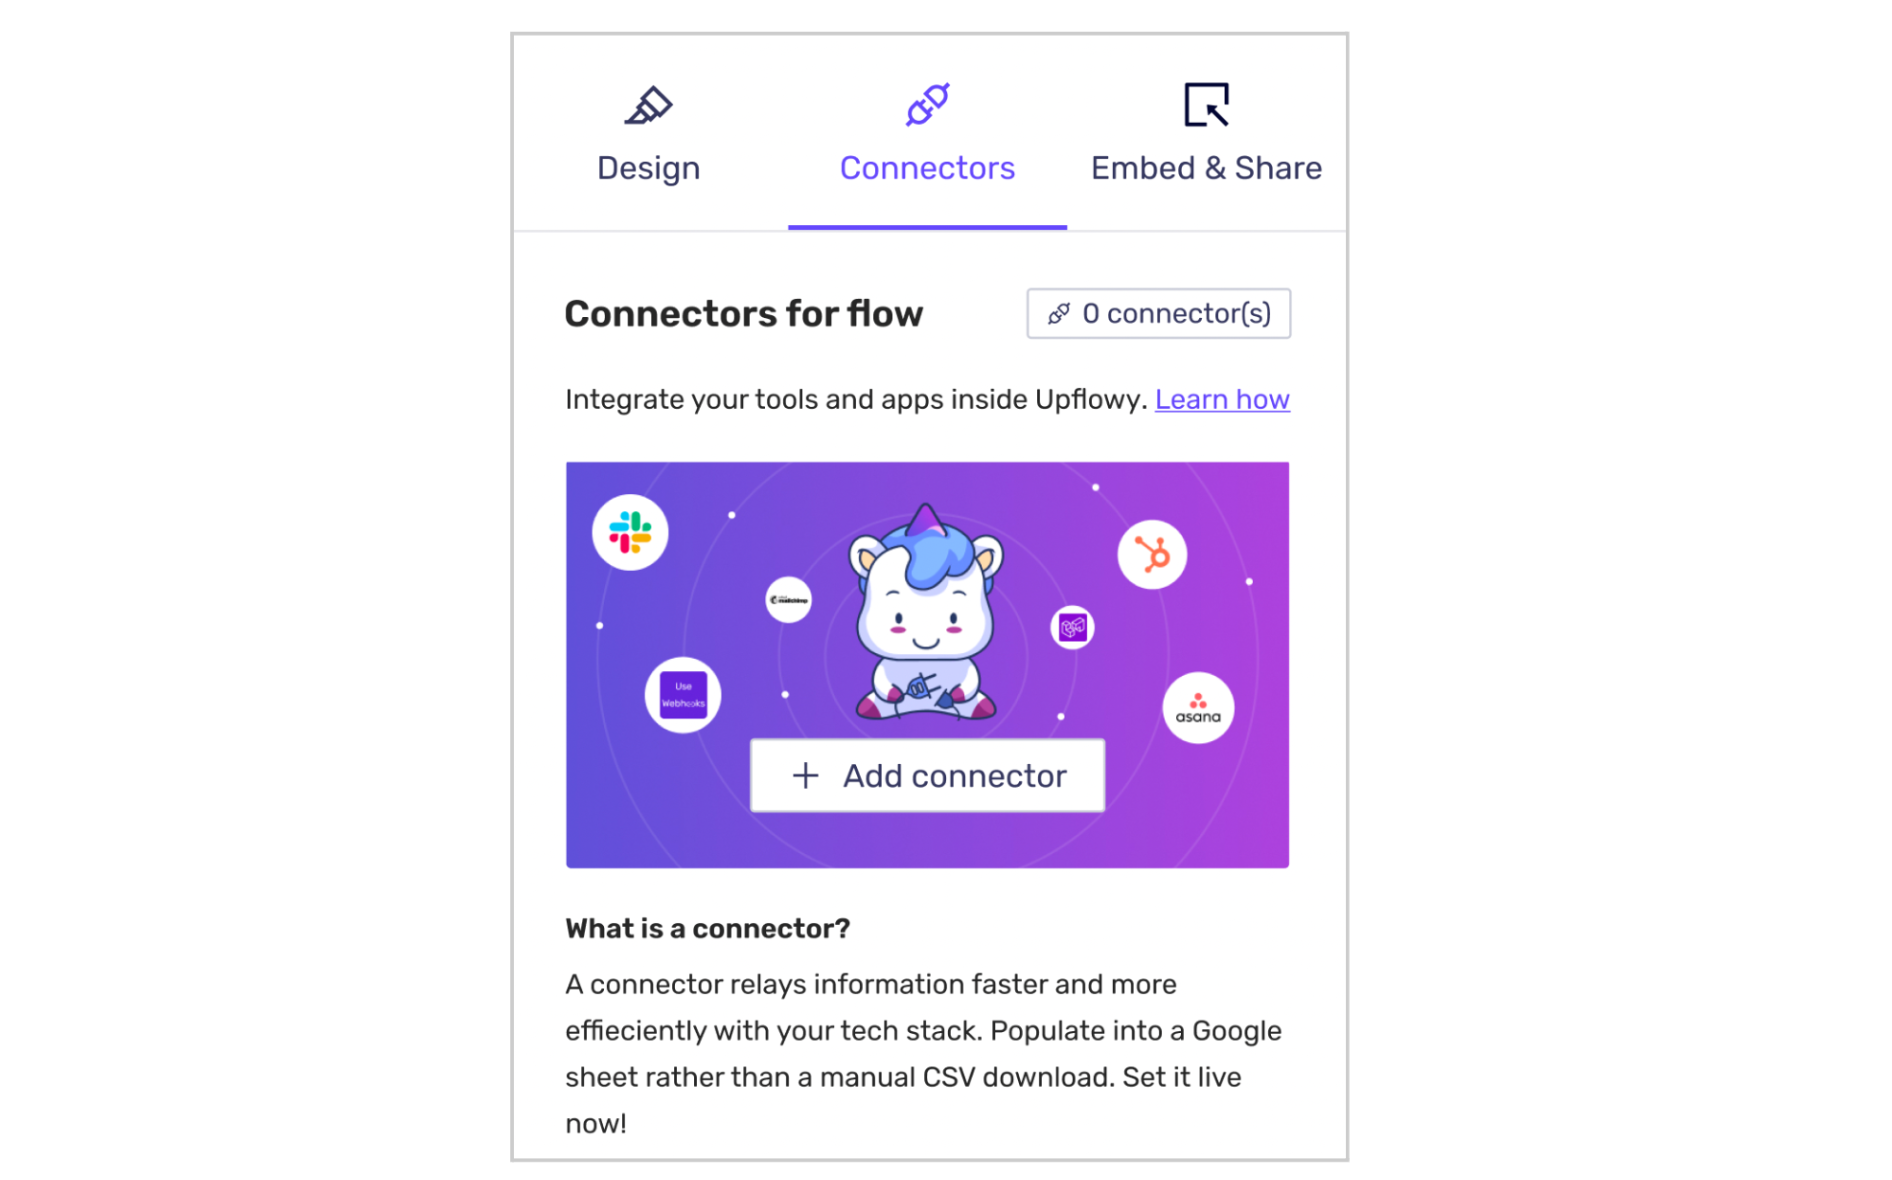
Select the Add connector button and a modal will appear.
Navigate to Create Advanced Connections from either the tab at the top of the card below.
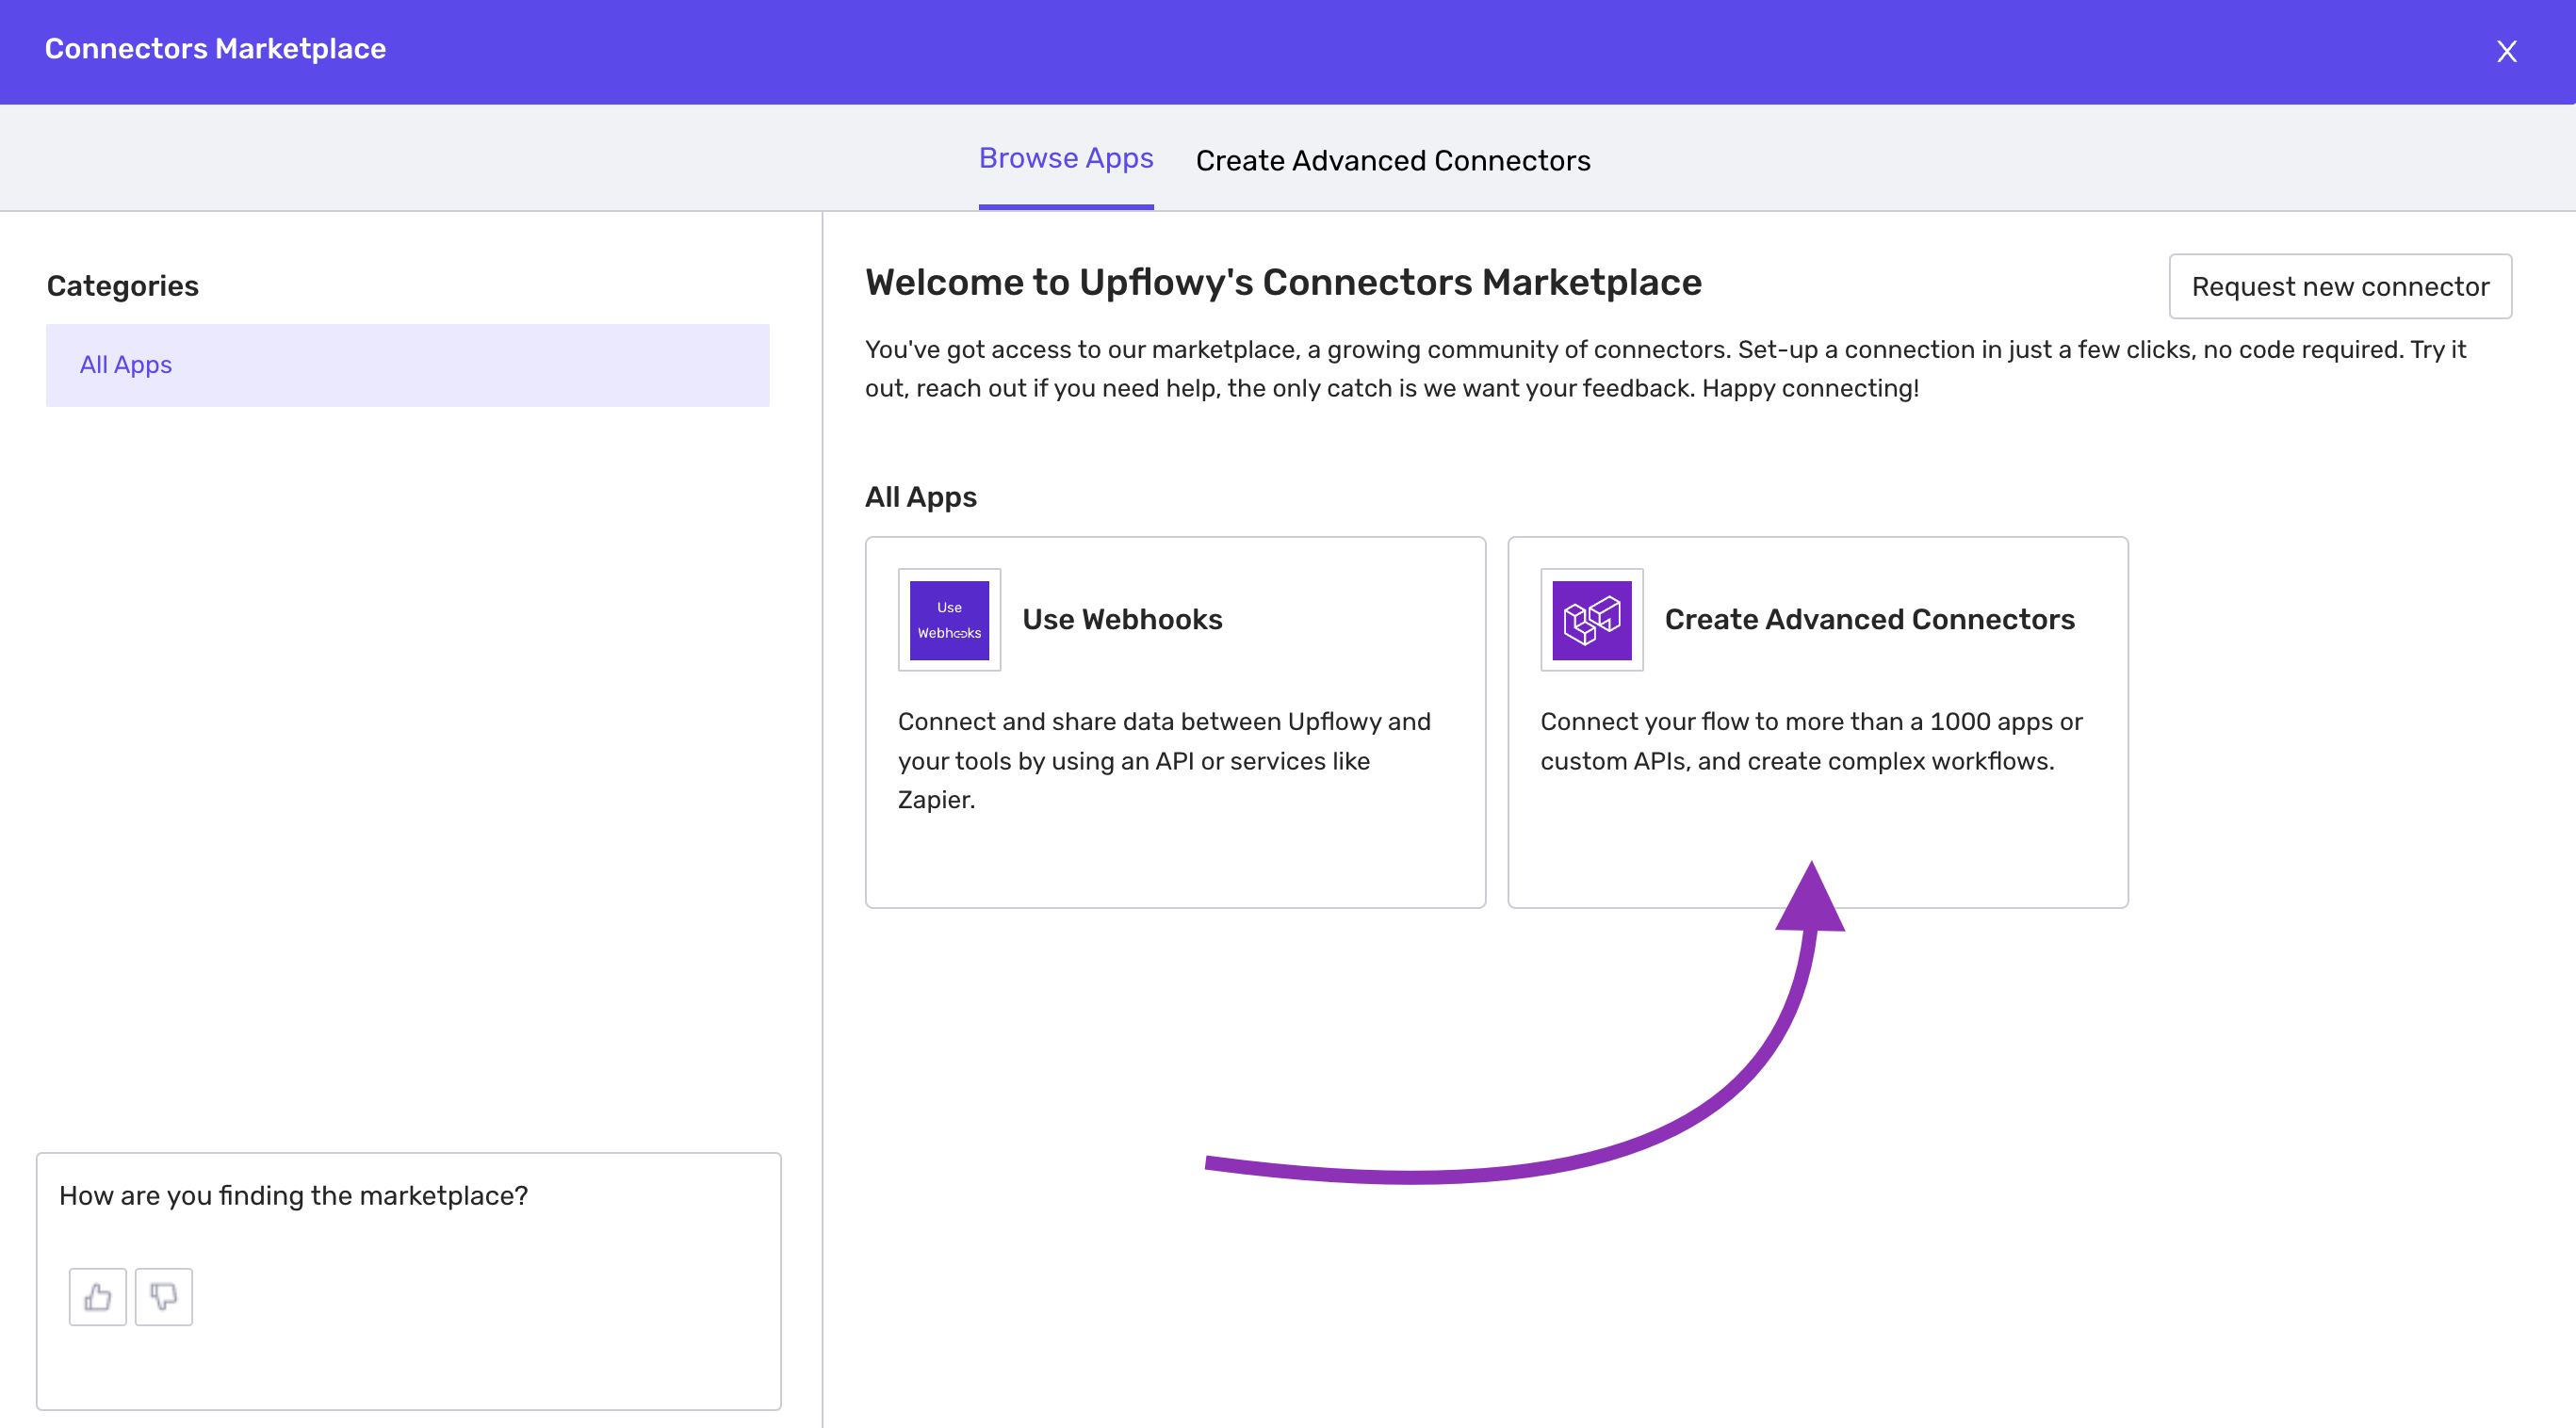
You will enter the details screen for Advanced Connections. Select Create Connection to begin. Note: you need to be granted access to use this feature.
Connect Clickup with Advanced Connections
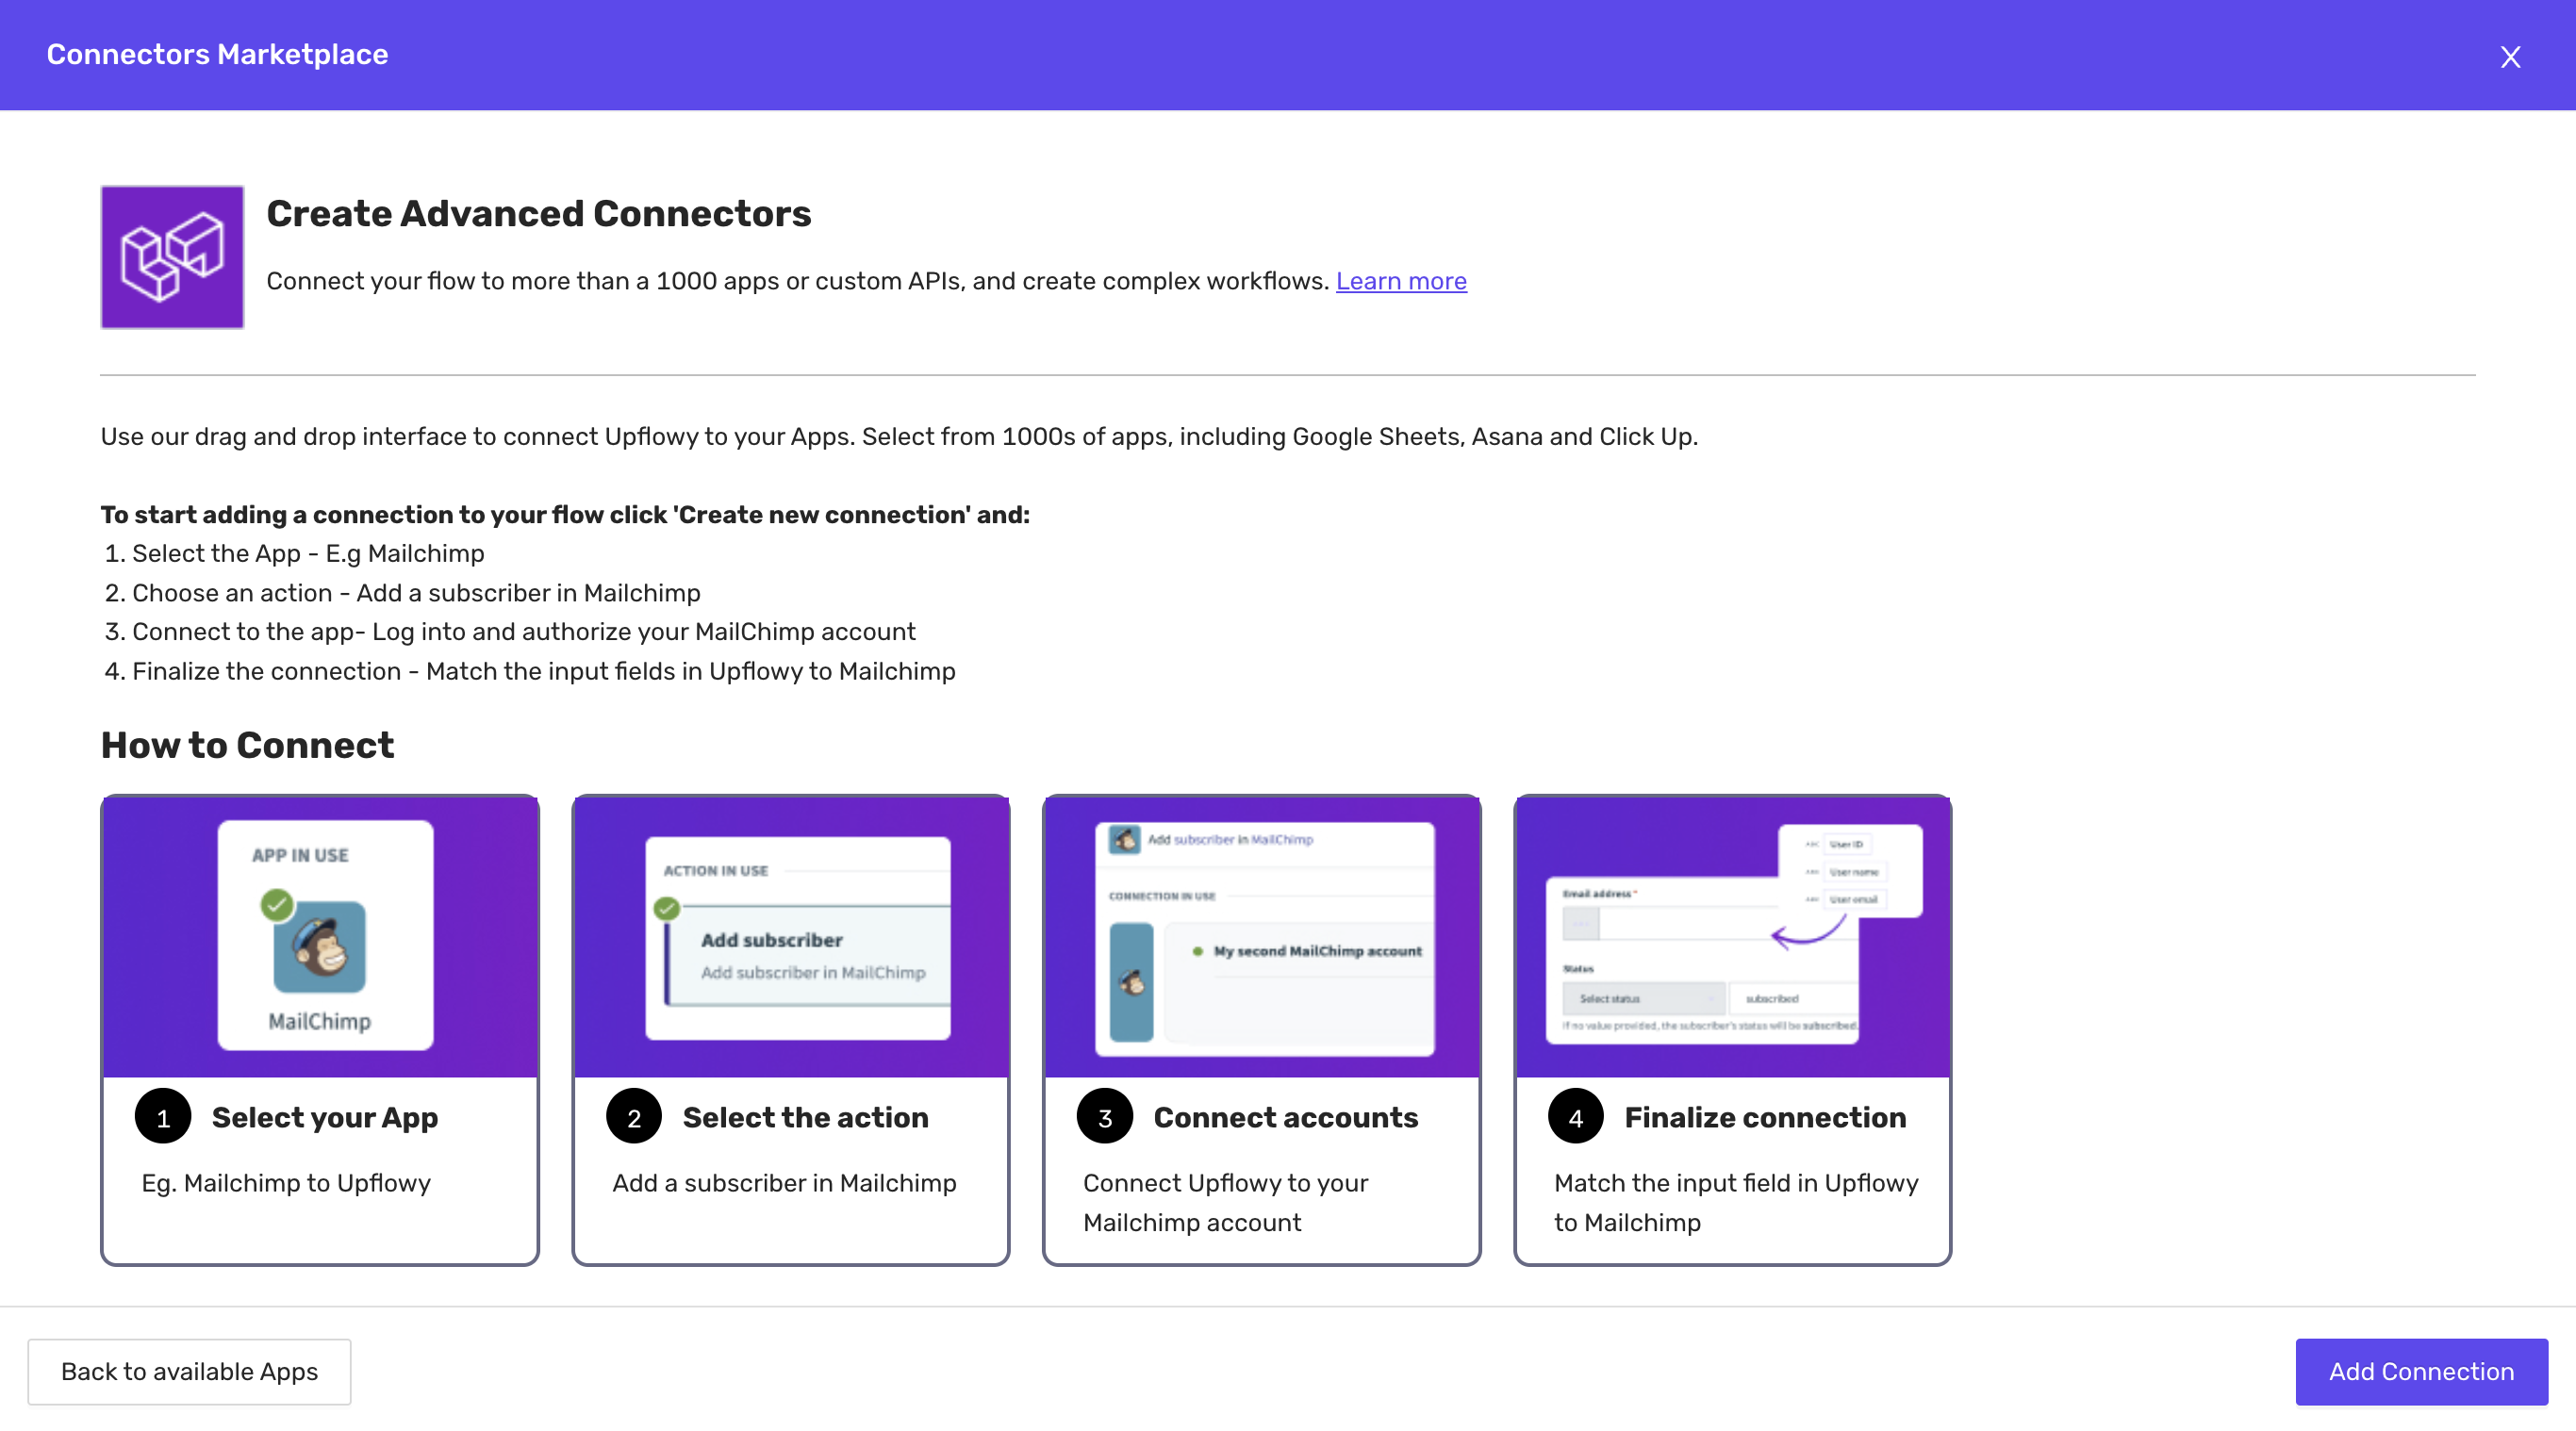
There are four parts to setting up an advanced connection.
Step one: Select your App
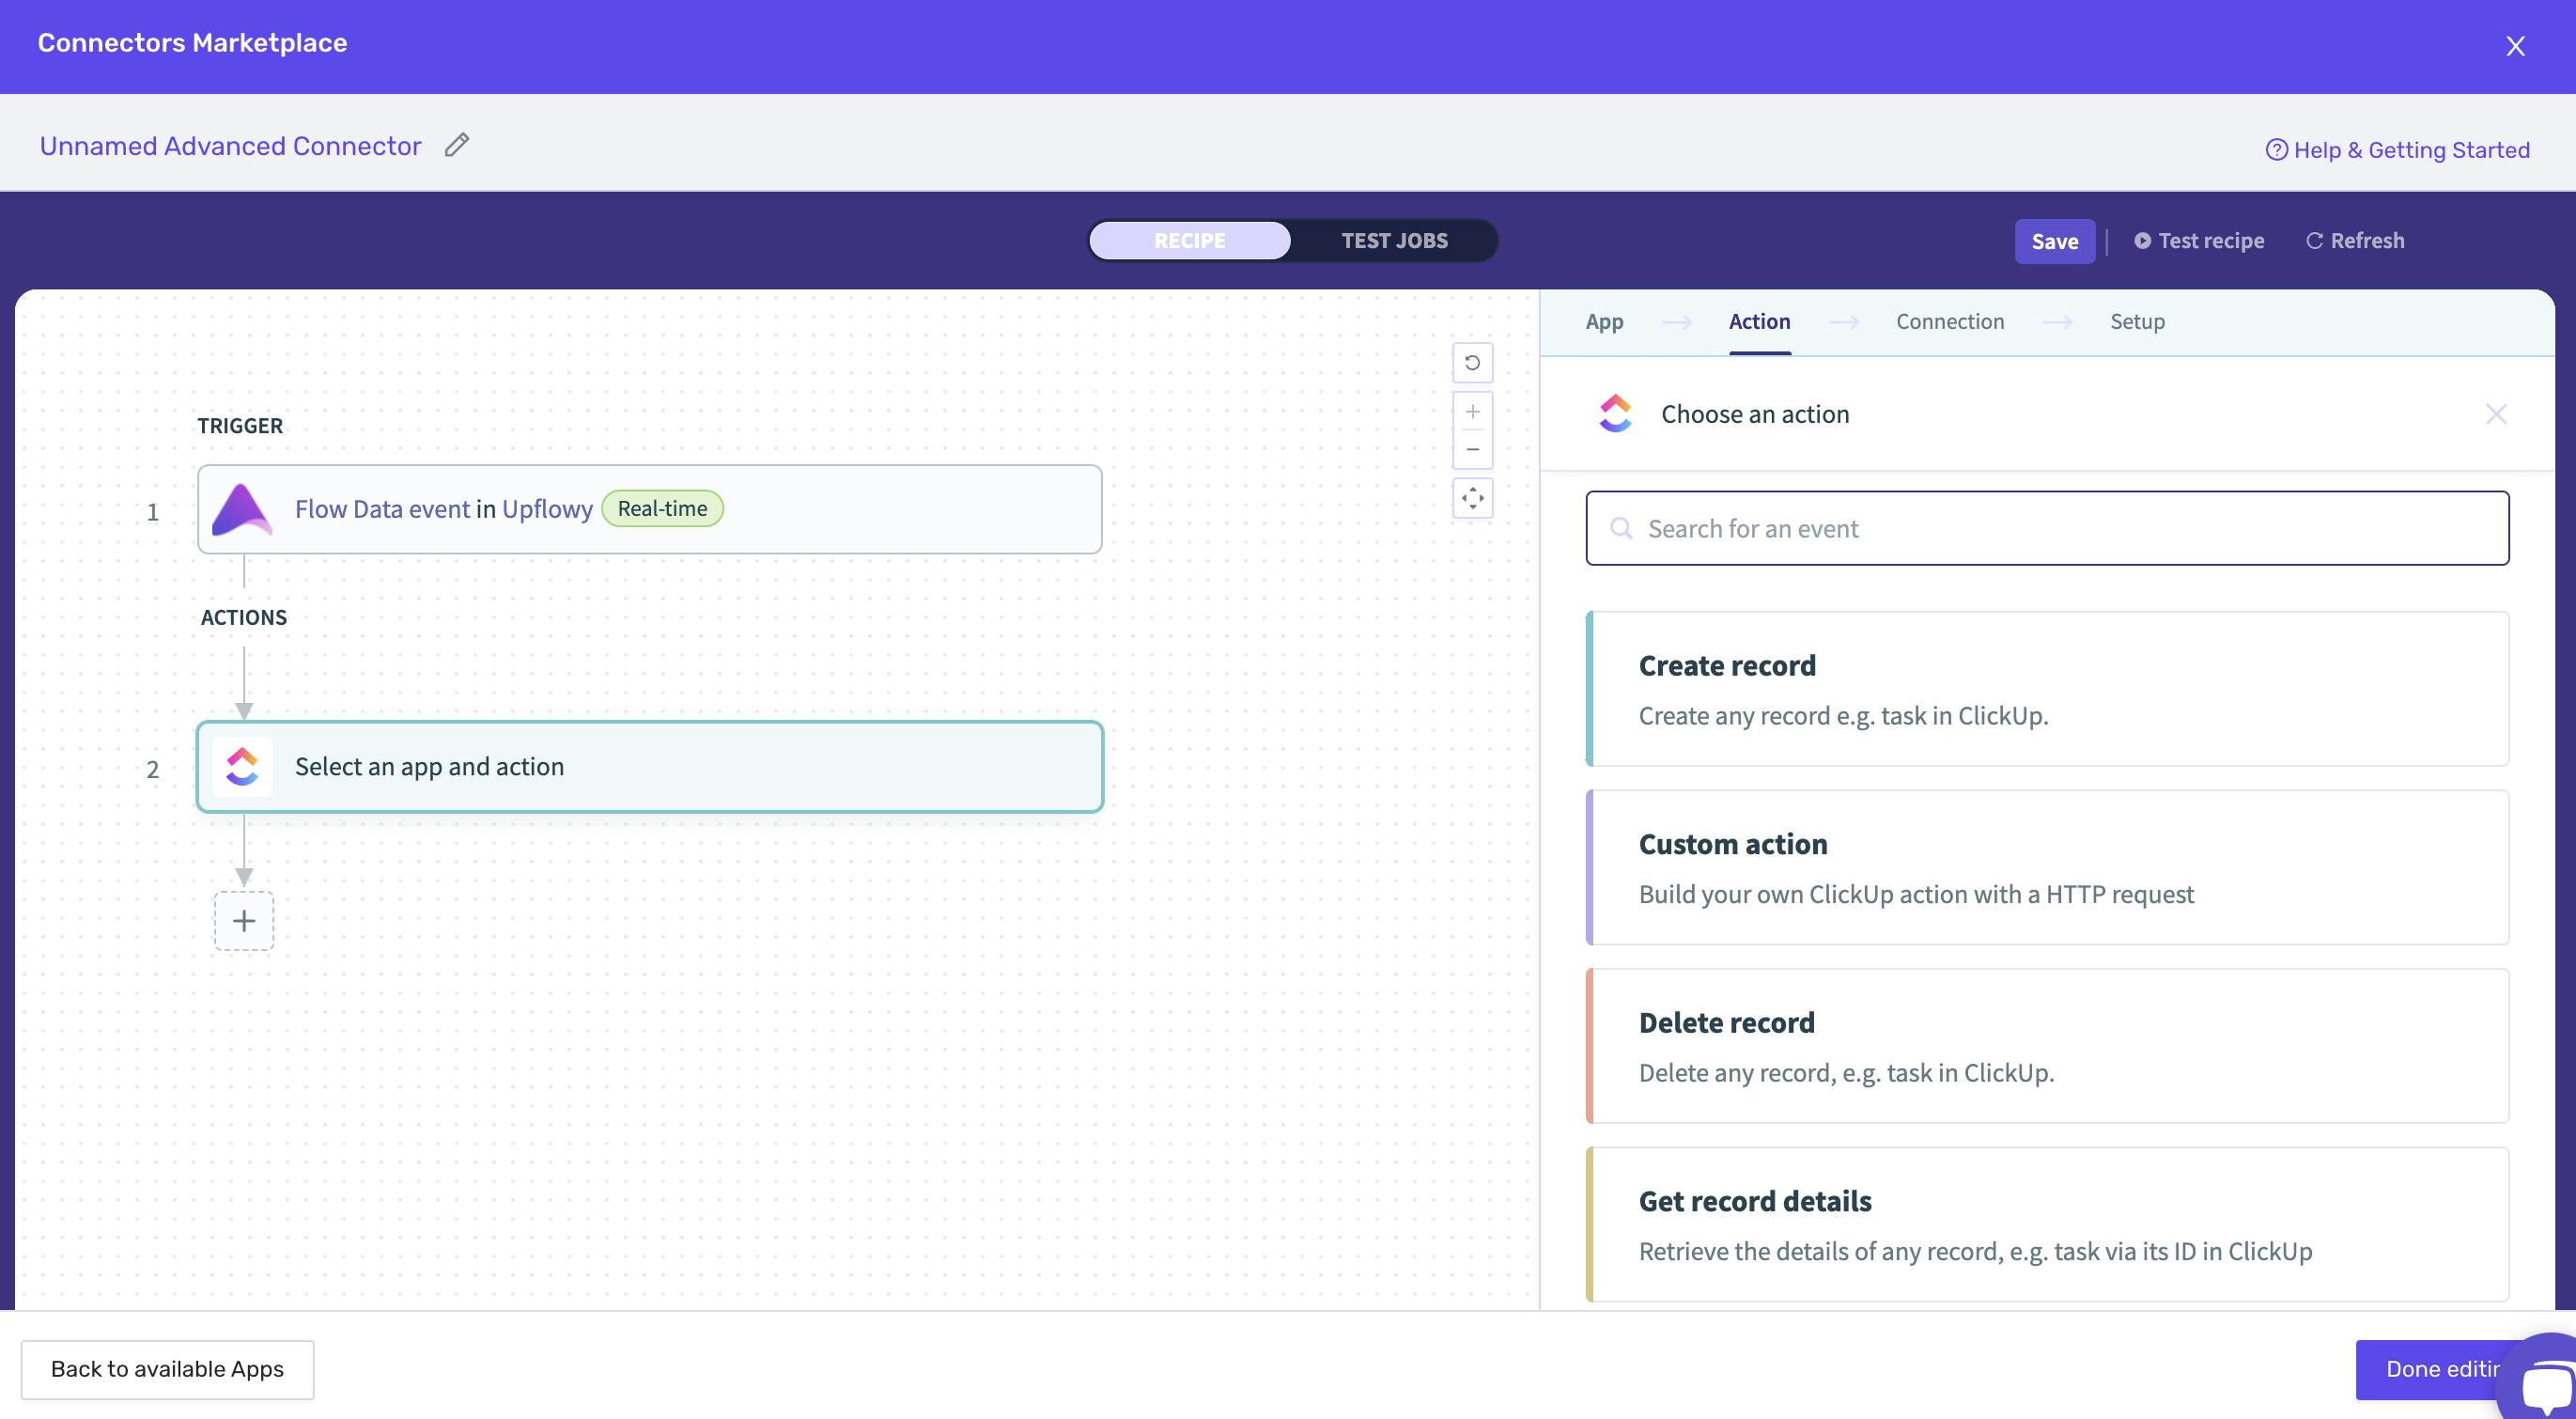
Select the plus + button that appears underneath the actions heading. Use this to start building what you want to happen every time a user completes a step or flow. You have multiple options to choose from:
- Action in app
- IF condition
- IF/ELSE condition
- Repeat action
- Call function
- Stop job
- Handle errors
Select Action in the app. From here you will be able to search for the app you would like to connect.
Step two: Choose an action
Select what you want to happen in the app when a user completes a step or flow.
Step three: Connection
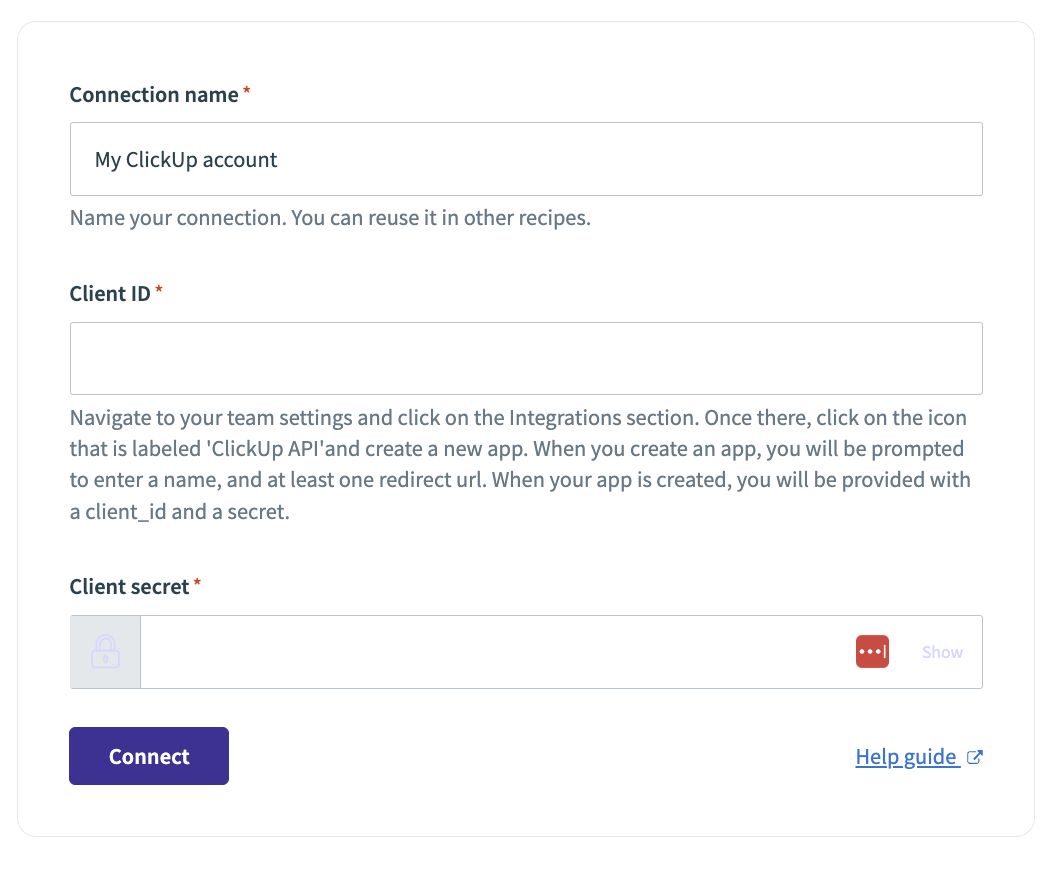
Connect Upflowy to Clickup by giving the connection a name, then providing the client ID and secret. Note: this connection is only visible to you, and other users cannot access it.
Step four: Setup
Now, all you need to do is customize the settings to achieve the goal you are looking for. This will depend on your specific needs.
To learn more about the API capabilities of Clickup, visit their documentation at the following link.
An alternative way to connect with Clickup: Make
To set up a connection using Integromat, you'll need Integromat and your Upflowy flow open.
In Integromat, go to the "Scenarios" tab:

Click on "Create a new scenario":

Click on the plus button, and type in "Webhooks", and select the Webhooks option.
Select "Custom webhook".


Add in a Webhook name and click "Save".

At this point, Integromat will generate a webhook link for you! Copy this link, and then head over to your Upflowy flow.
Click on a step, and go into the "Connectors" tab. Copy this webhooks link into the available input and click "Save".
Once this has been saved, preview the step, enter data into all the fields, and click submit. Then, go back to Integromat, which should have picked up on the data. You will be able to tell if this has succeeded by the "Successfully determined" notification:

Click "OK" and then add another module. Search ClickUp and select it:

Select the action that you'd like ClickUp to make when receiving this data:

Follow the Integromat prompts to store the data in the proper Workspace, Space, Folder and List. The data submitted through the webhooks can be used to create names of tasks or content:

Click "OK". and click "Run Once".

Go back to your Upflowy flow and run it through the preview. Once the data has been sent, Integromat should inform you that the webhooks were successful!
Now, switch the scheduling from "Off" to "On", and enjoy your webhooks being sent to ClickUp!