
Google Sheets
Follow these simple steps if you would like to
- add a new record to your sheet,
- update a row or a record,
- and more!
Advanced Connections are not available anymore. Scroll down to find instructions on how to connect to third-party tools through a webhook.
Navigate to Advanced Connections
To Create Advanced Connections ensure you are on the Edit tab at the top of your screen.
Navigate to the Connectors tab on the left panel. You can manage your connections at the step or flow level.
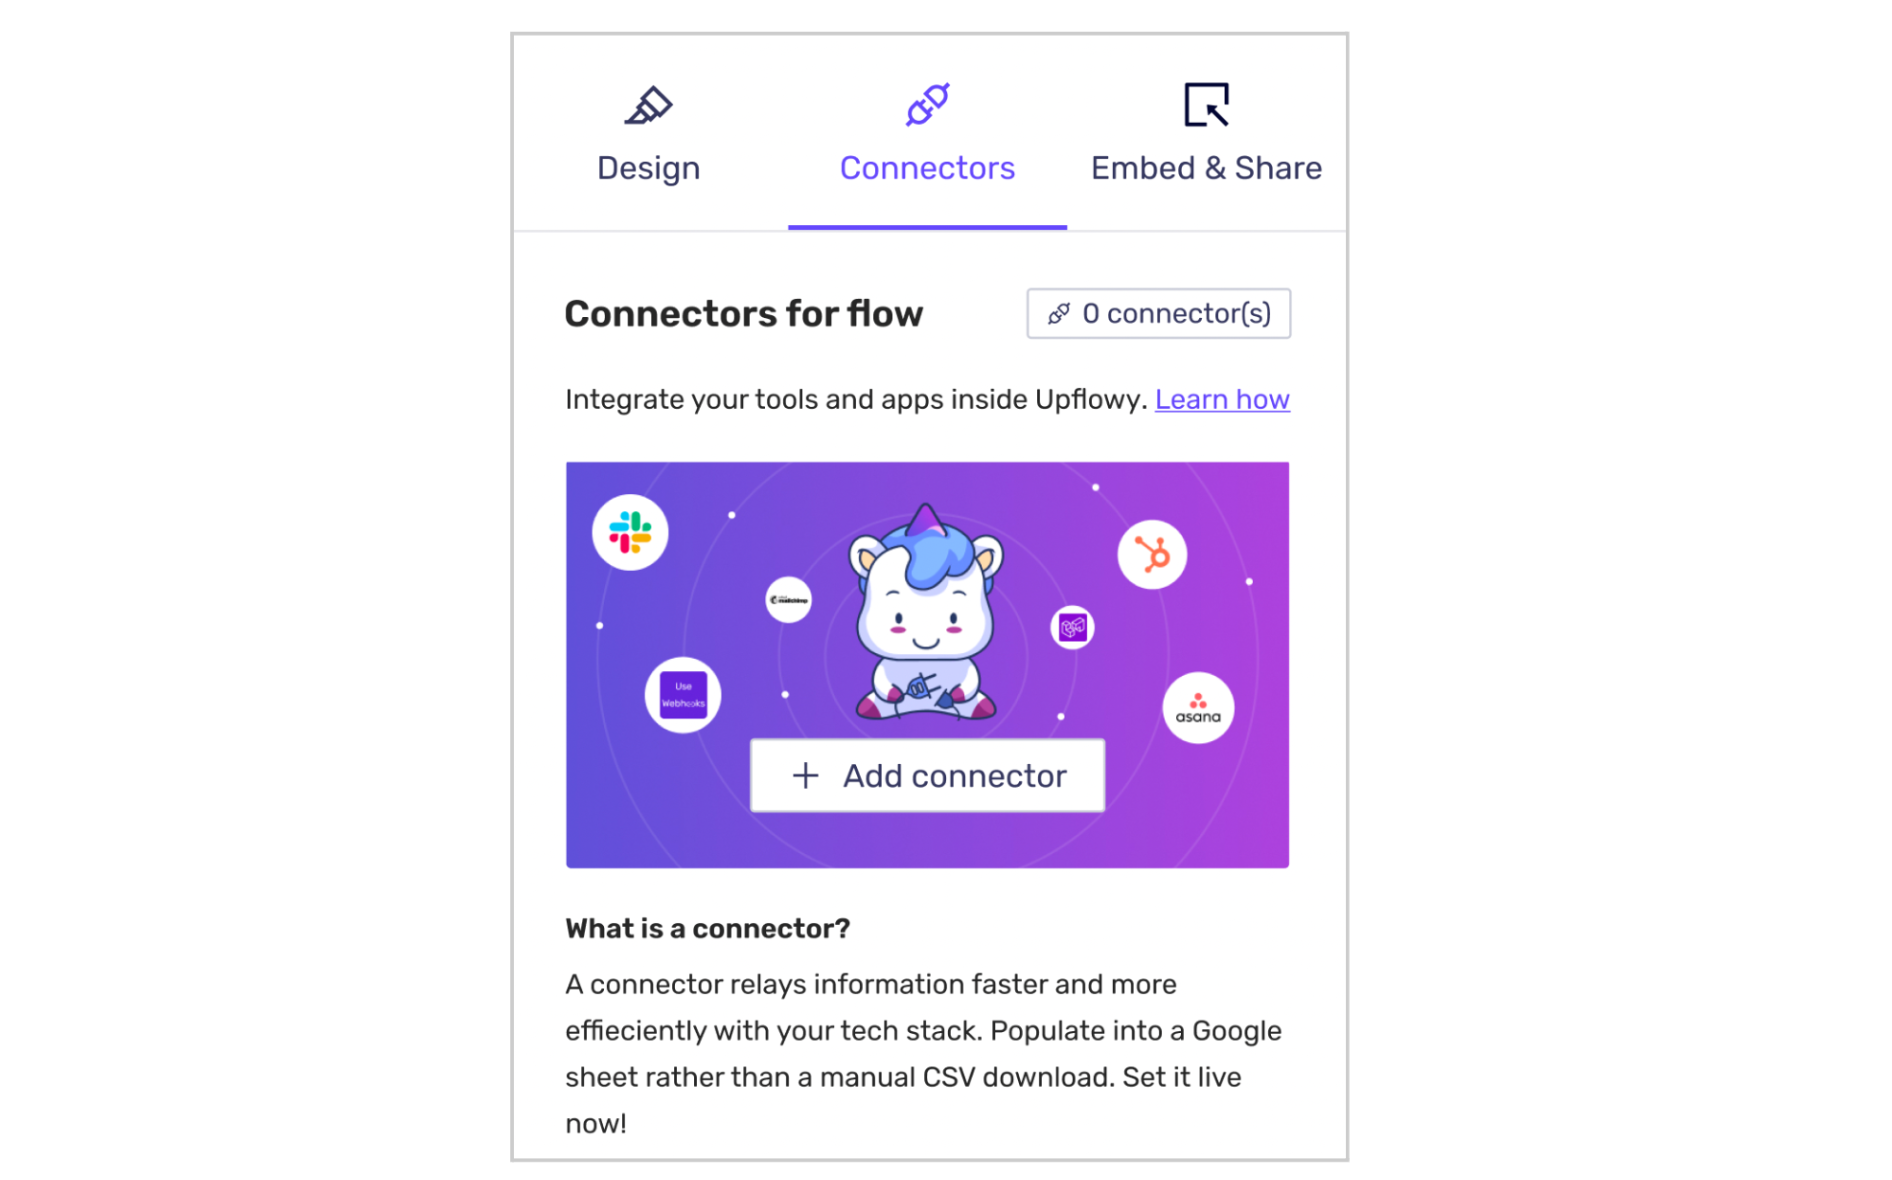
Select the Add connector button and a modal will appear.
Navigate to Create Advanced Connections from either the tab at the top of the card below.
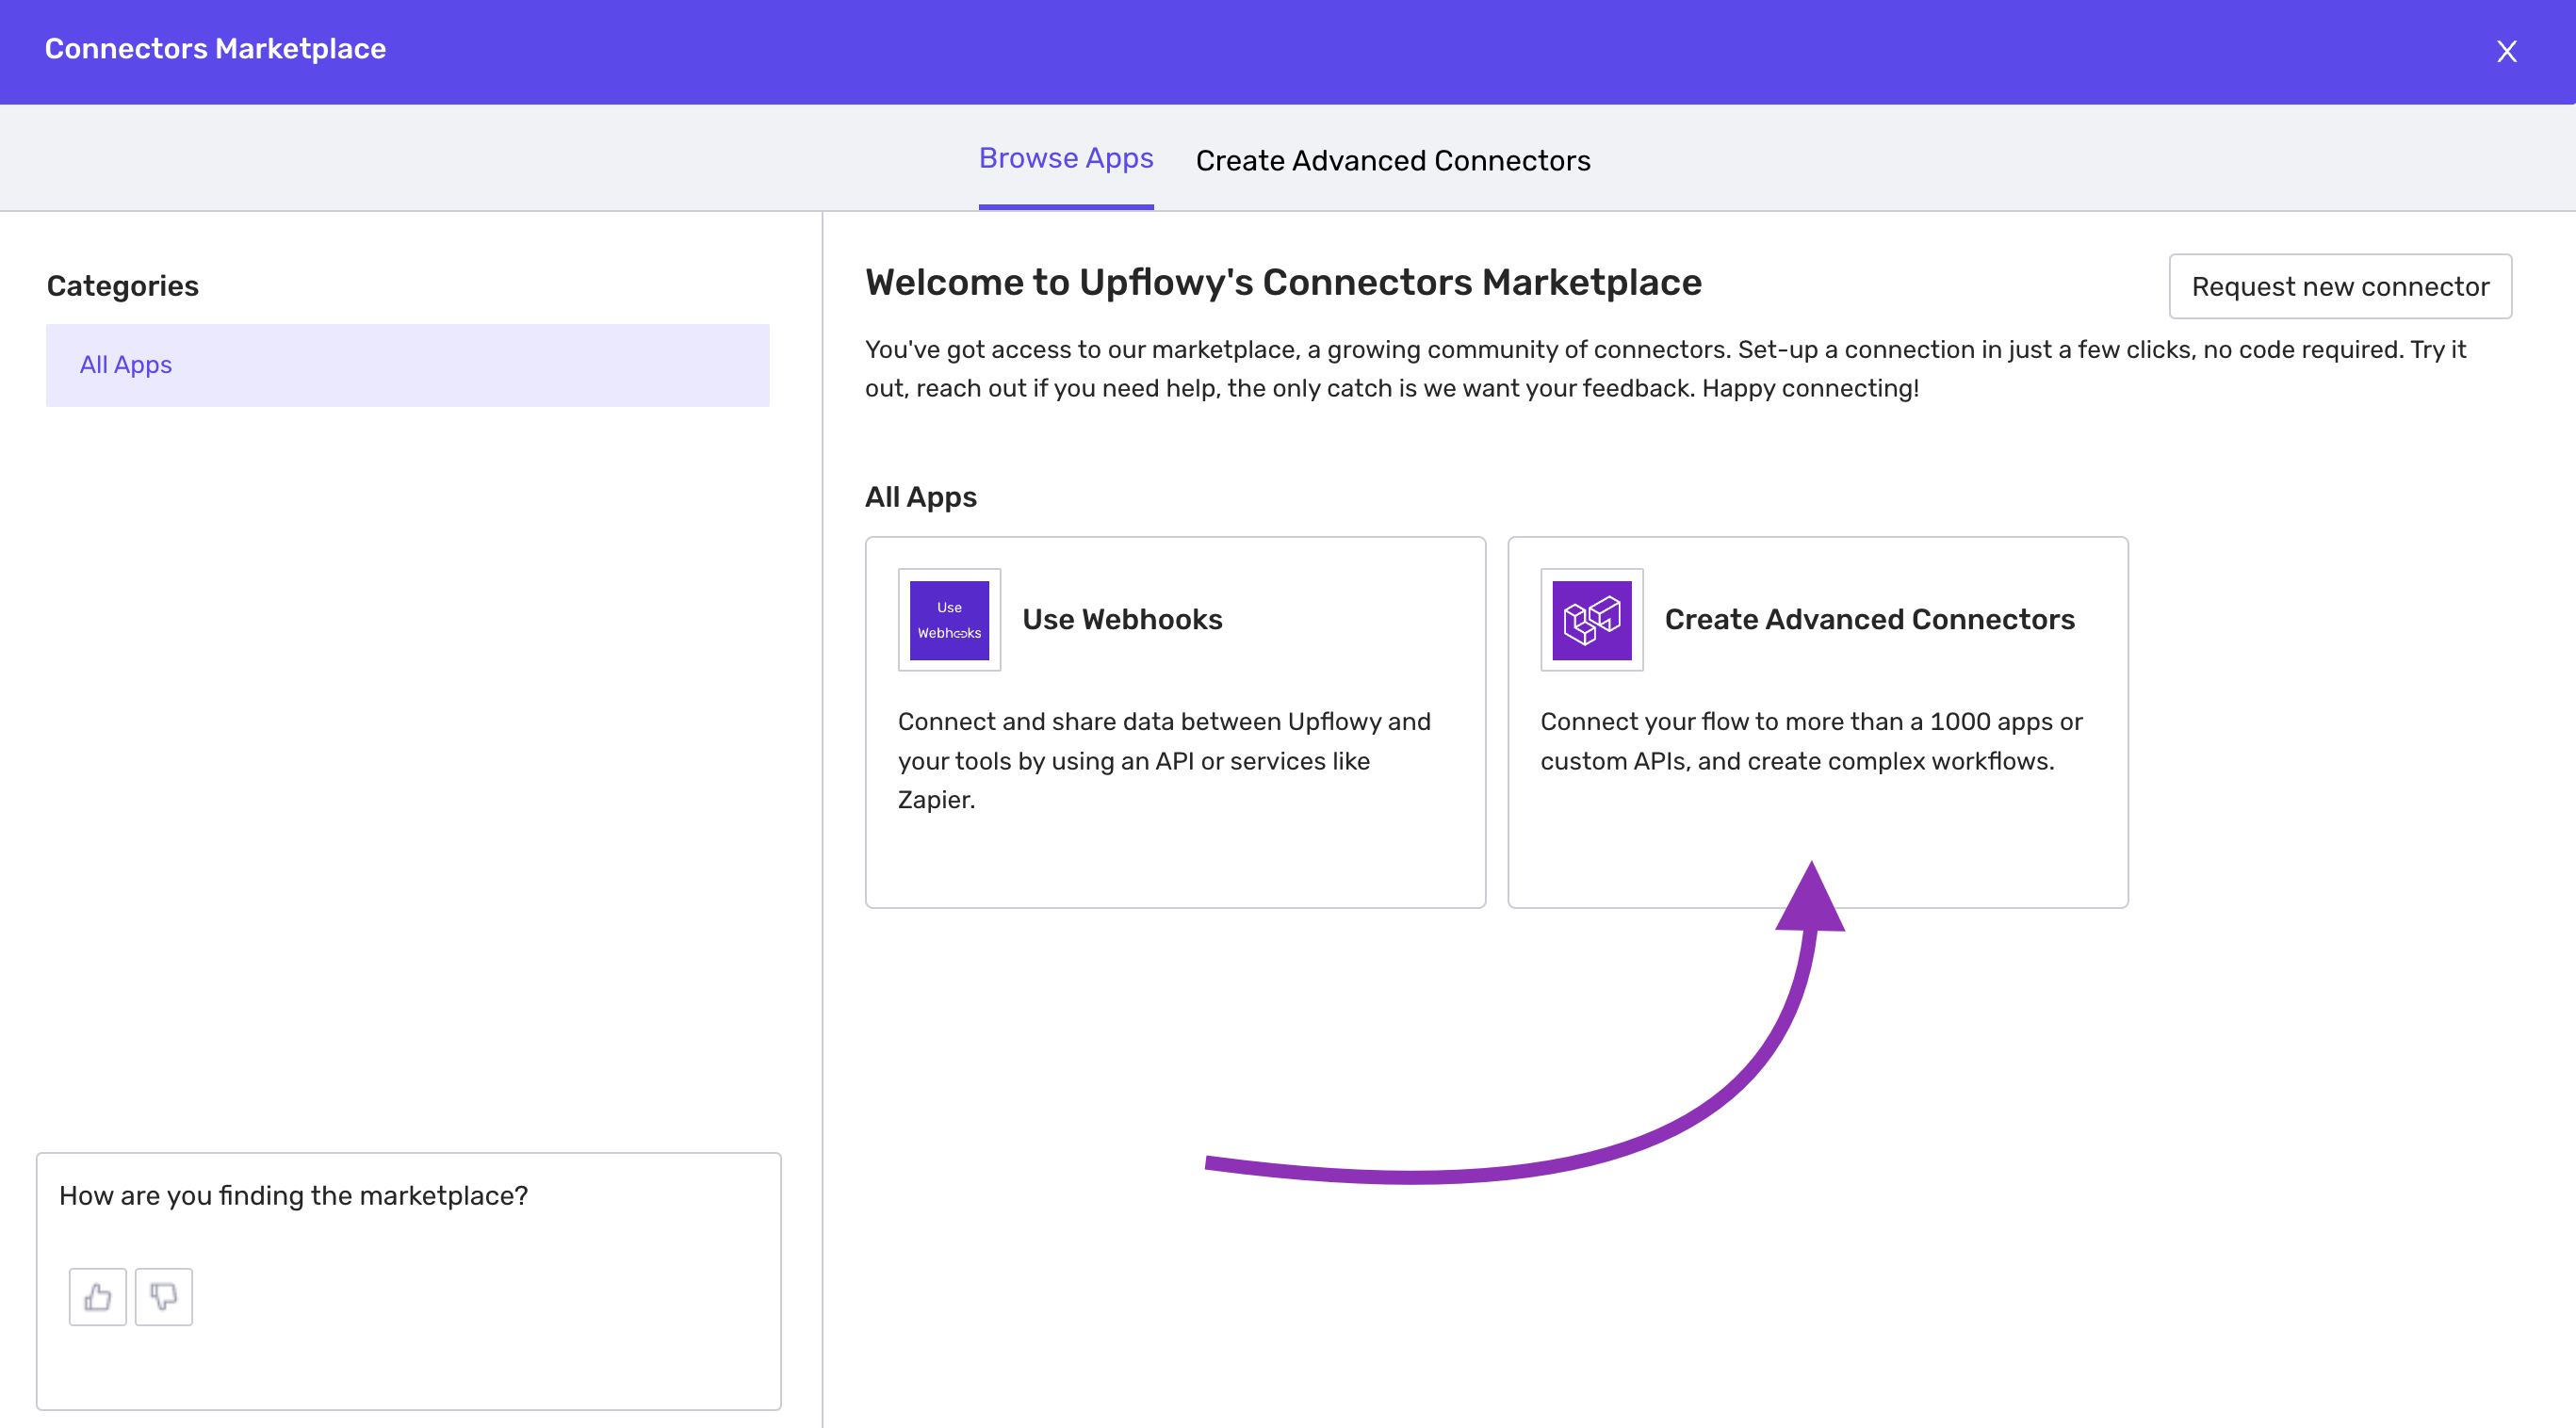
You will enter the details screen for Advanced Connections. Select Create Connection to begin. Note: you need to be granted access to use this feature.
Connect Google Sheets with Advanced Connections
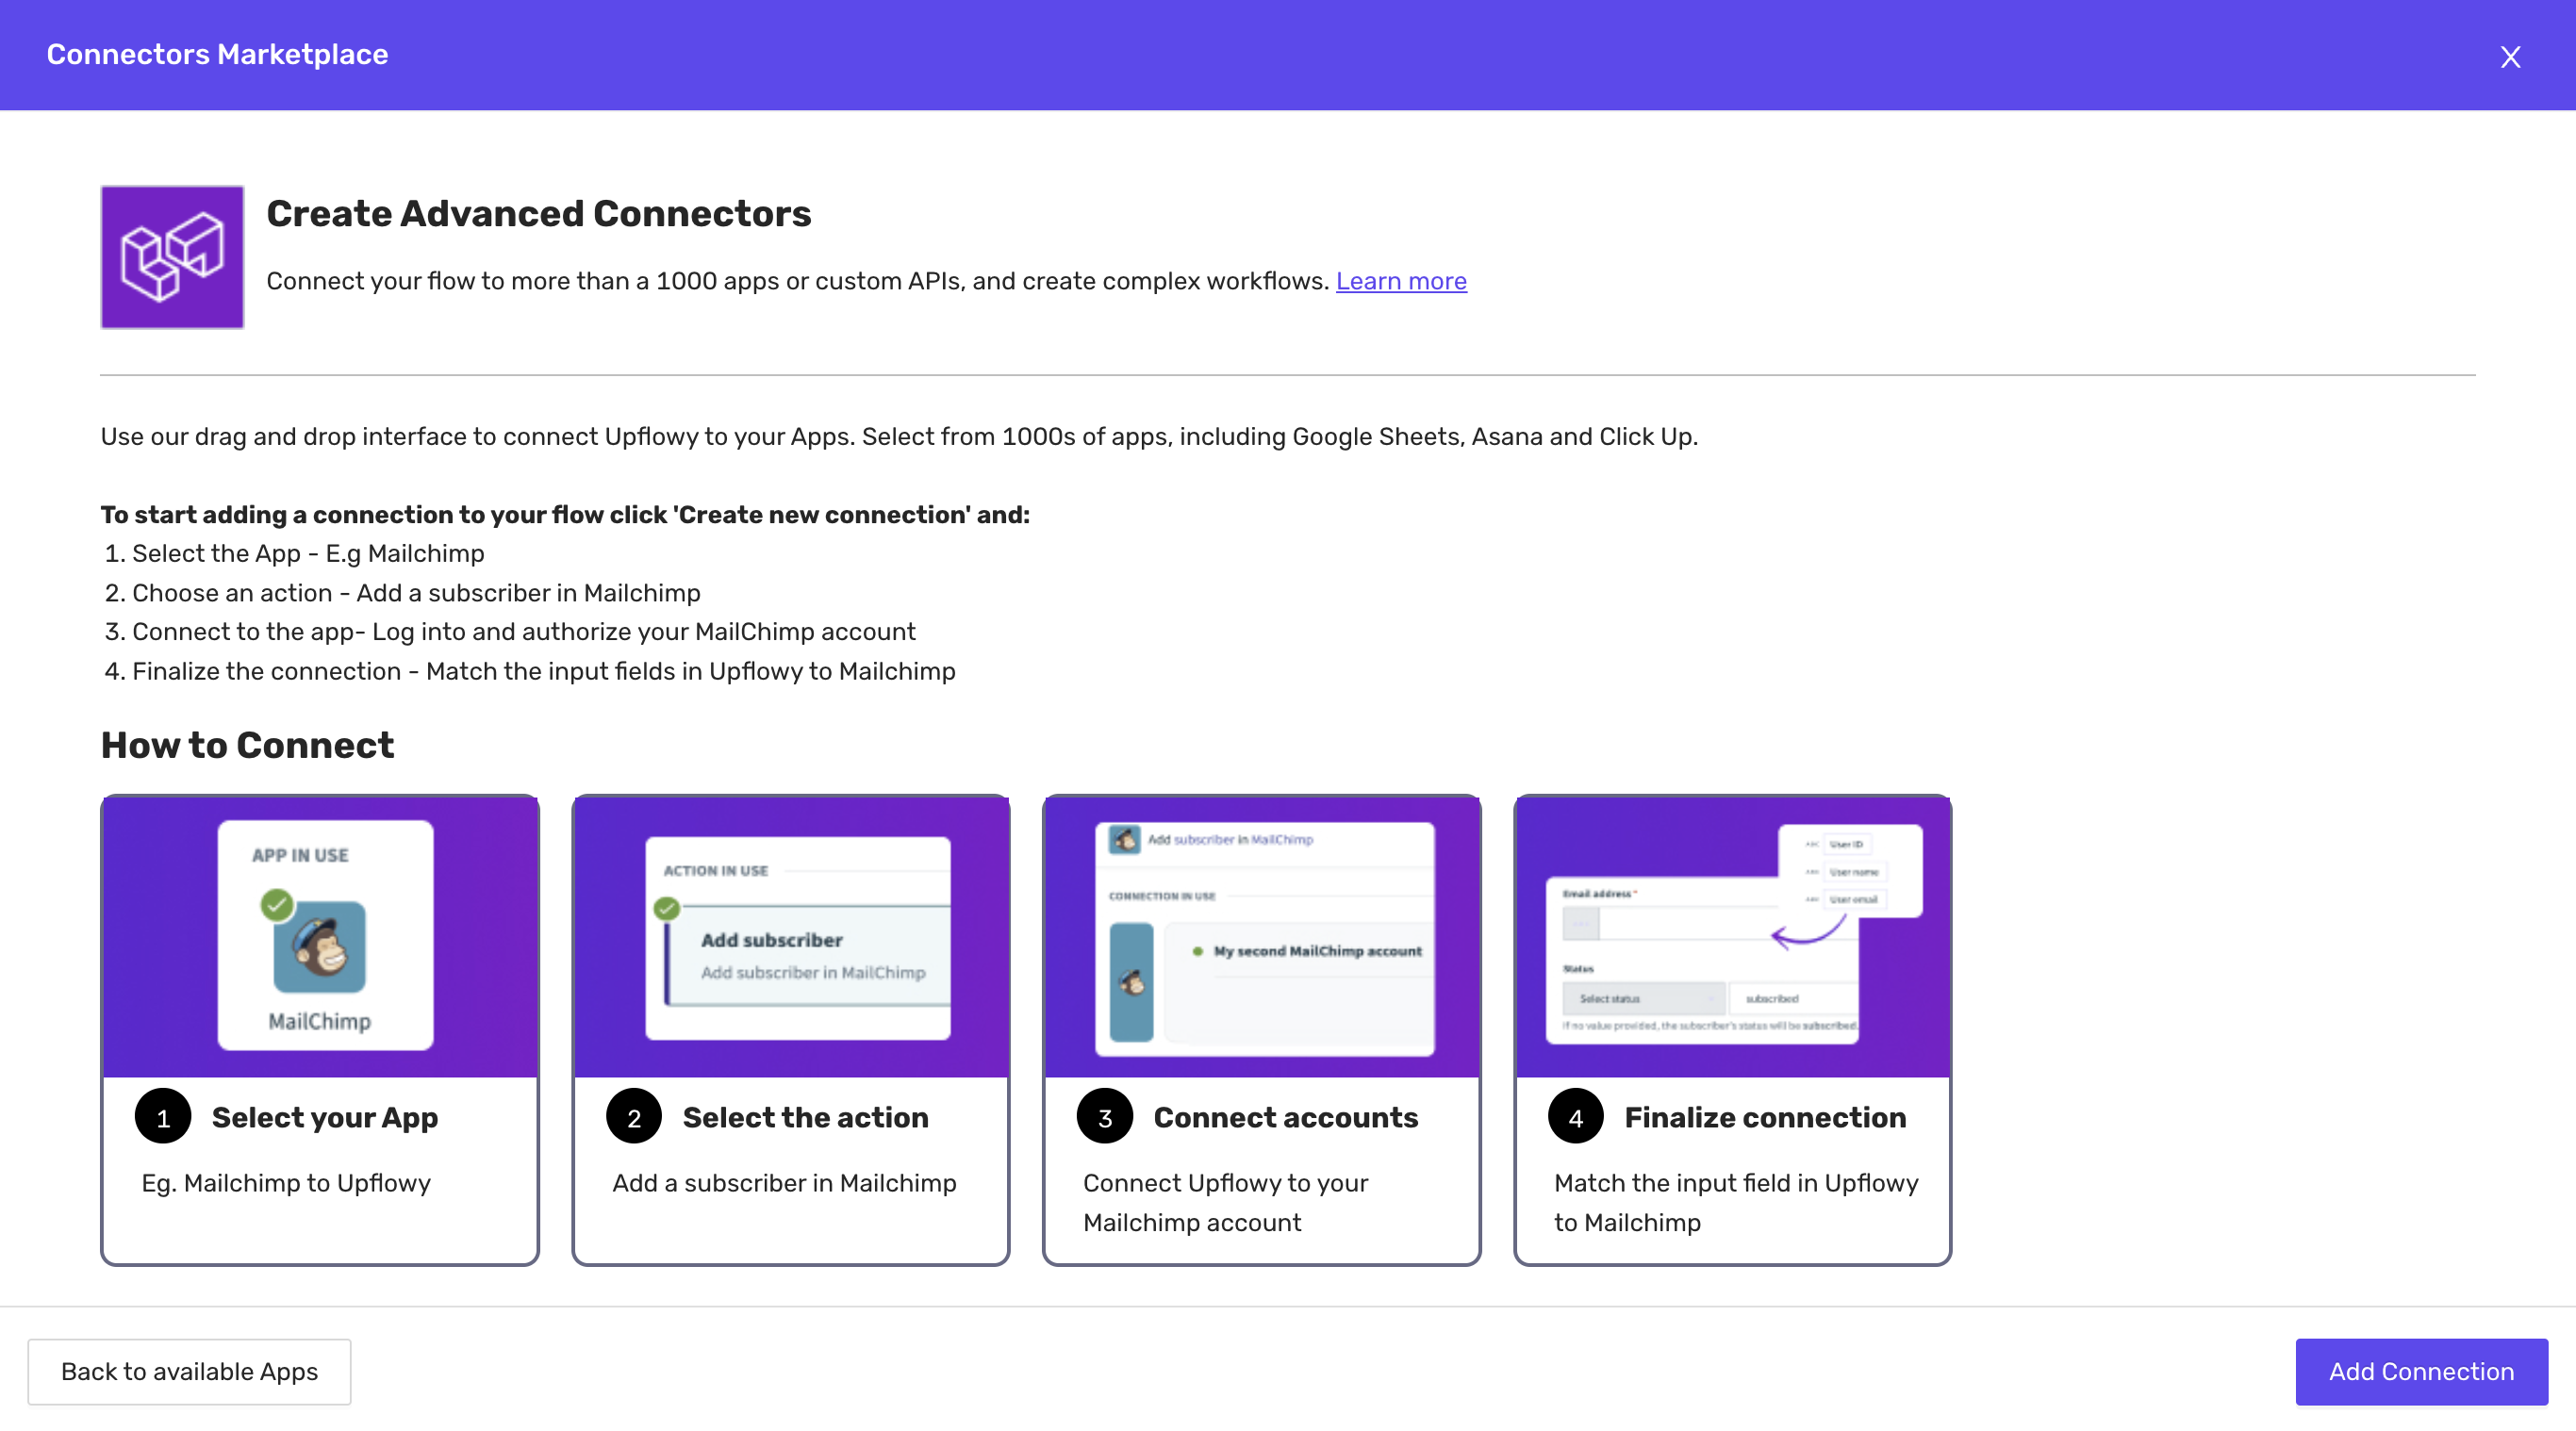
There are four parts to setting up an advanced connection.
Step one: Select your App
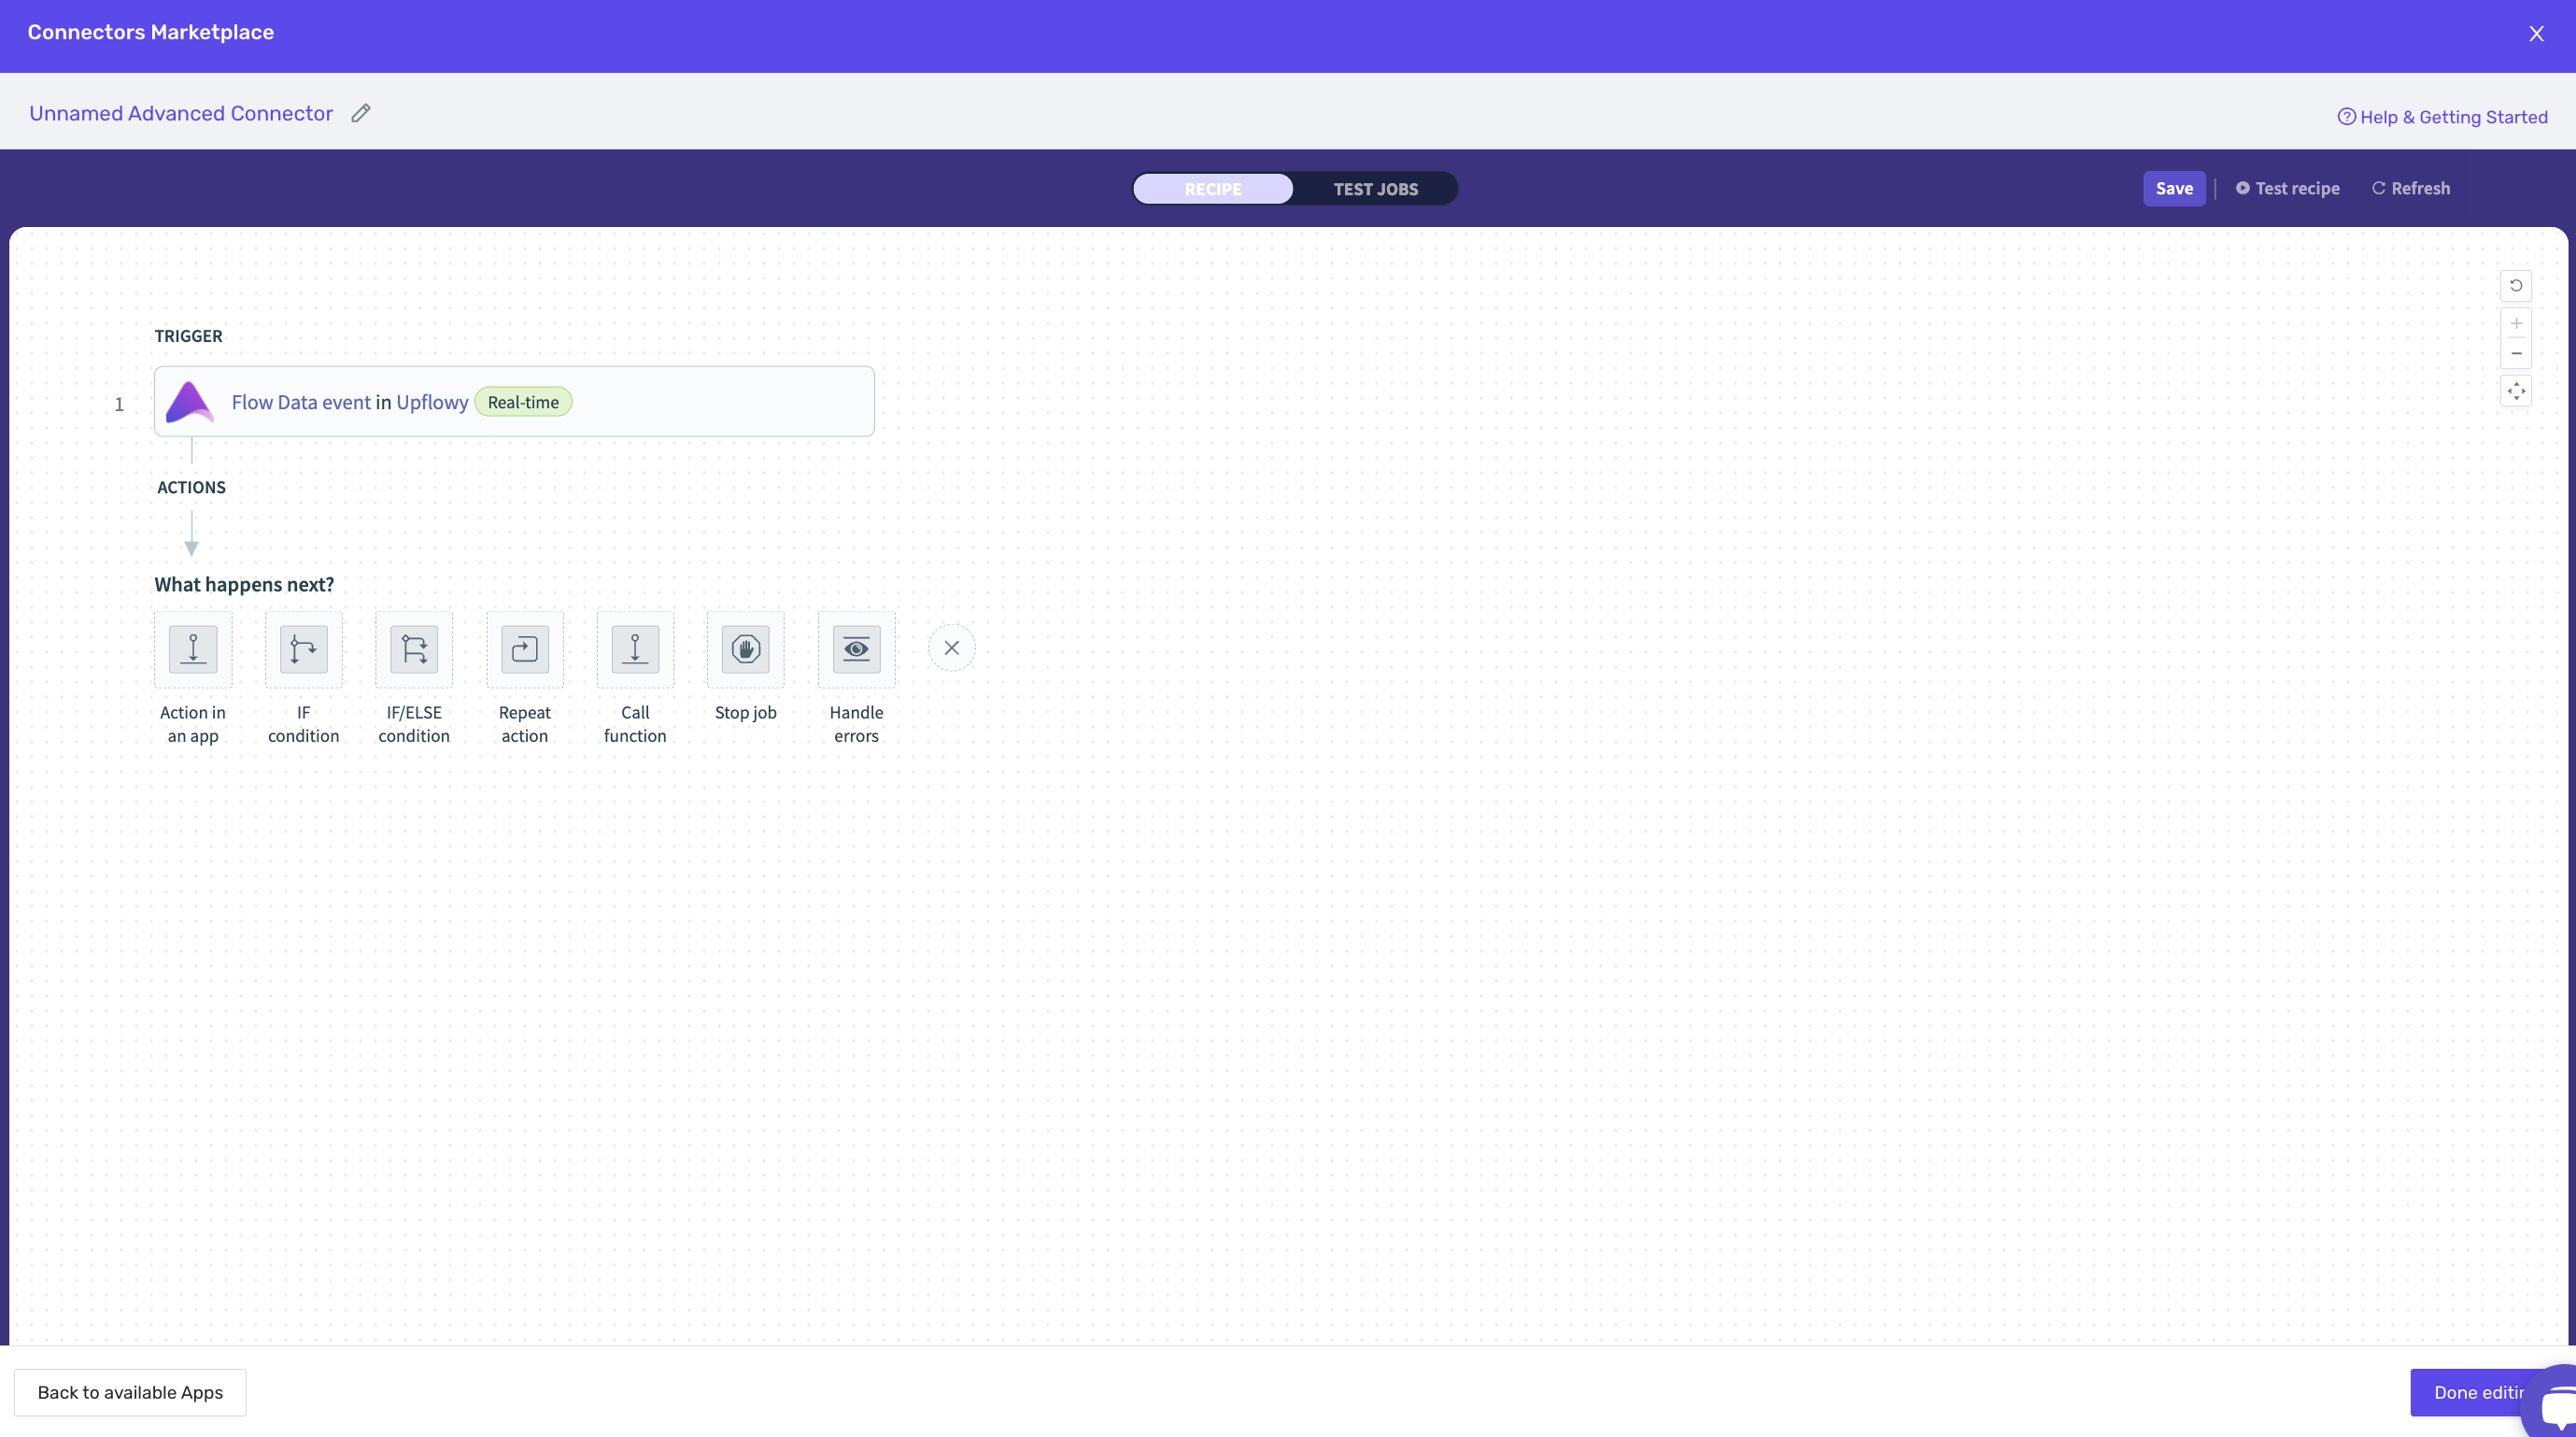
Select the plus + button that appears underneath the actions heading. Use this to start building what you want to happen every time a user completes a step or flow. You have multiple options to choose from:
- Action in app
- IF condition
- IF/ELSE condition
- Repeat action
- Call function
- Stop job
- Handle errors
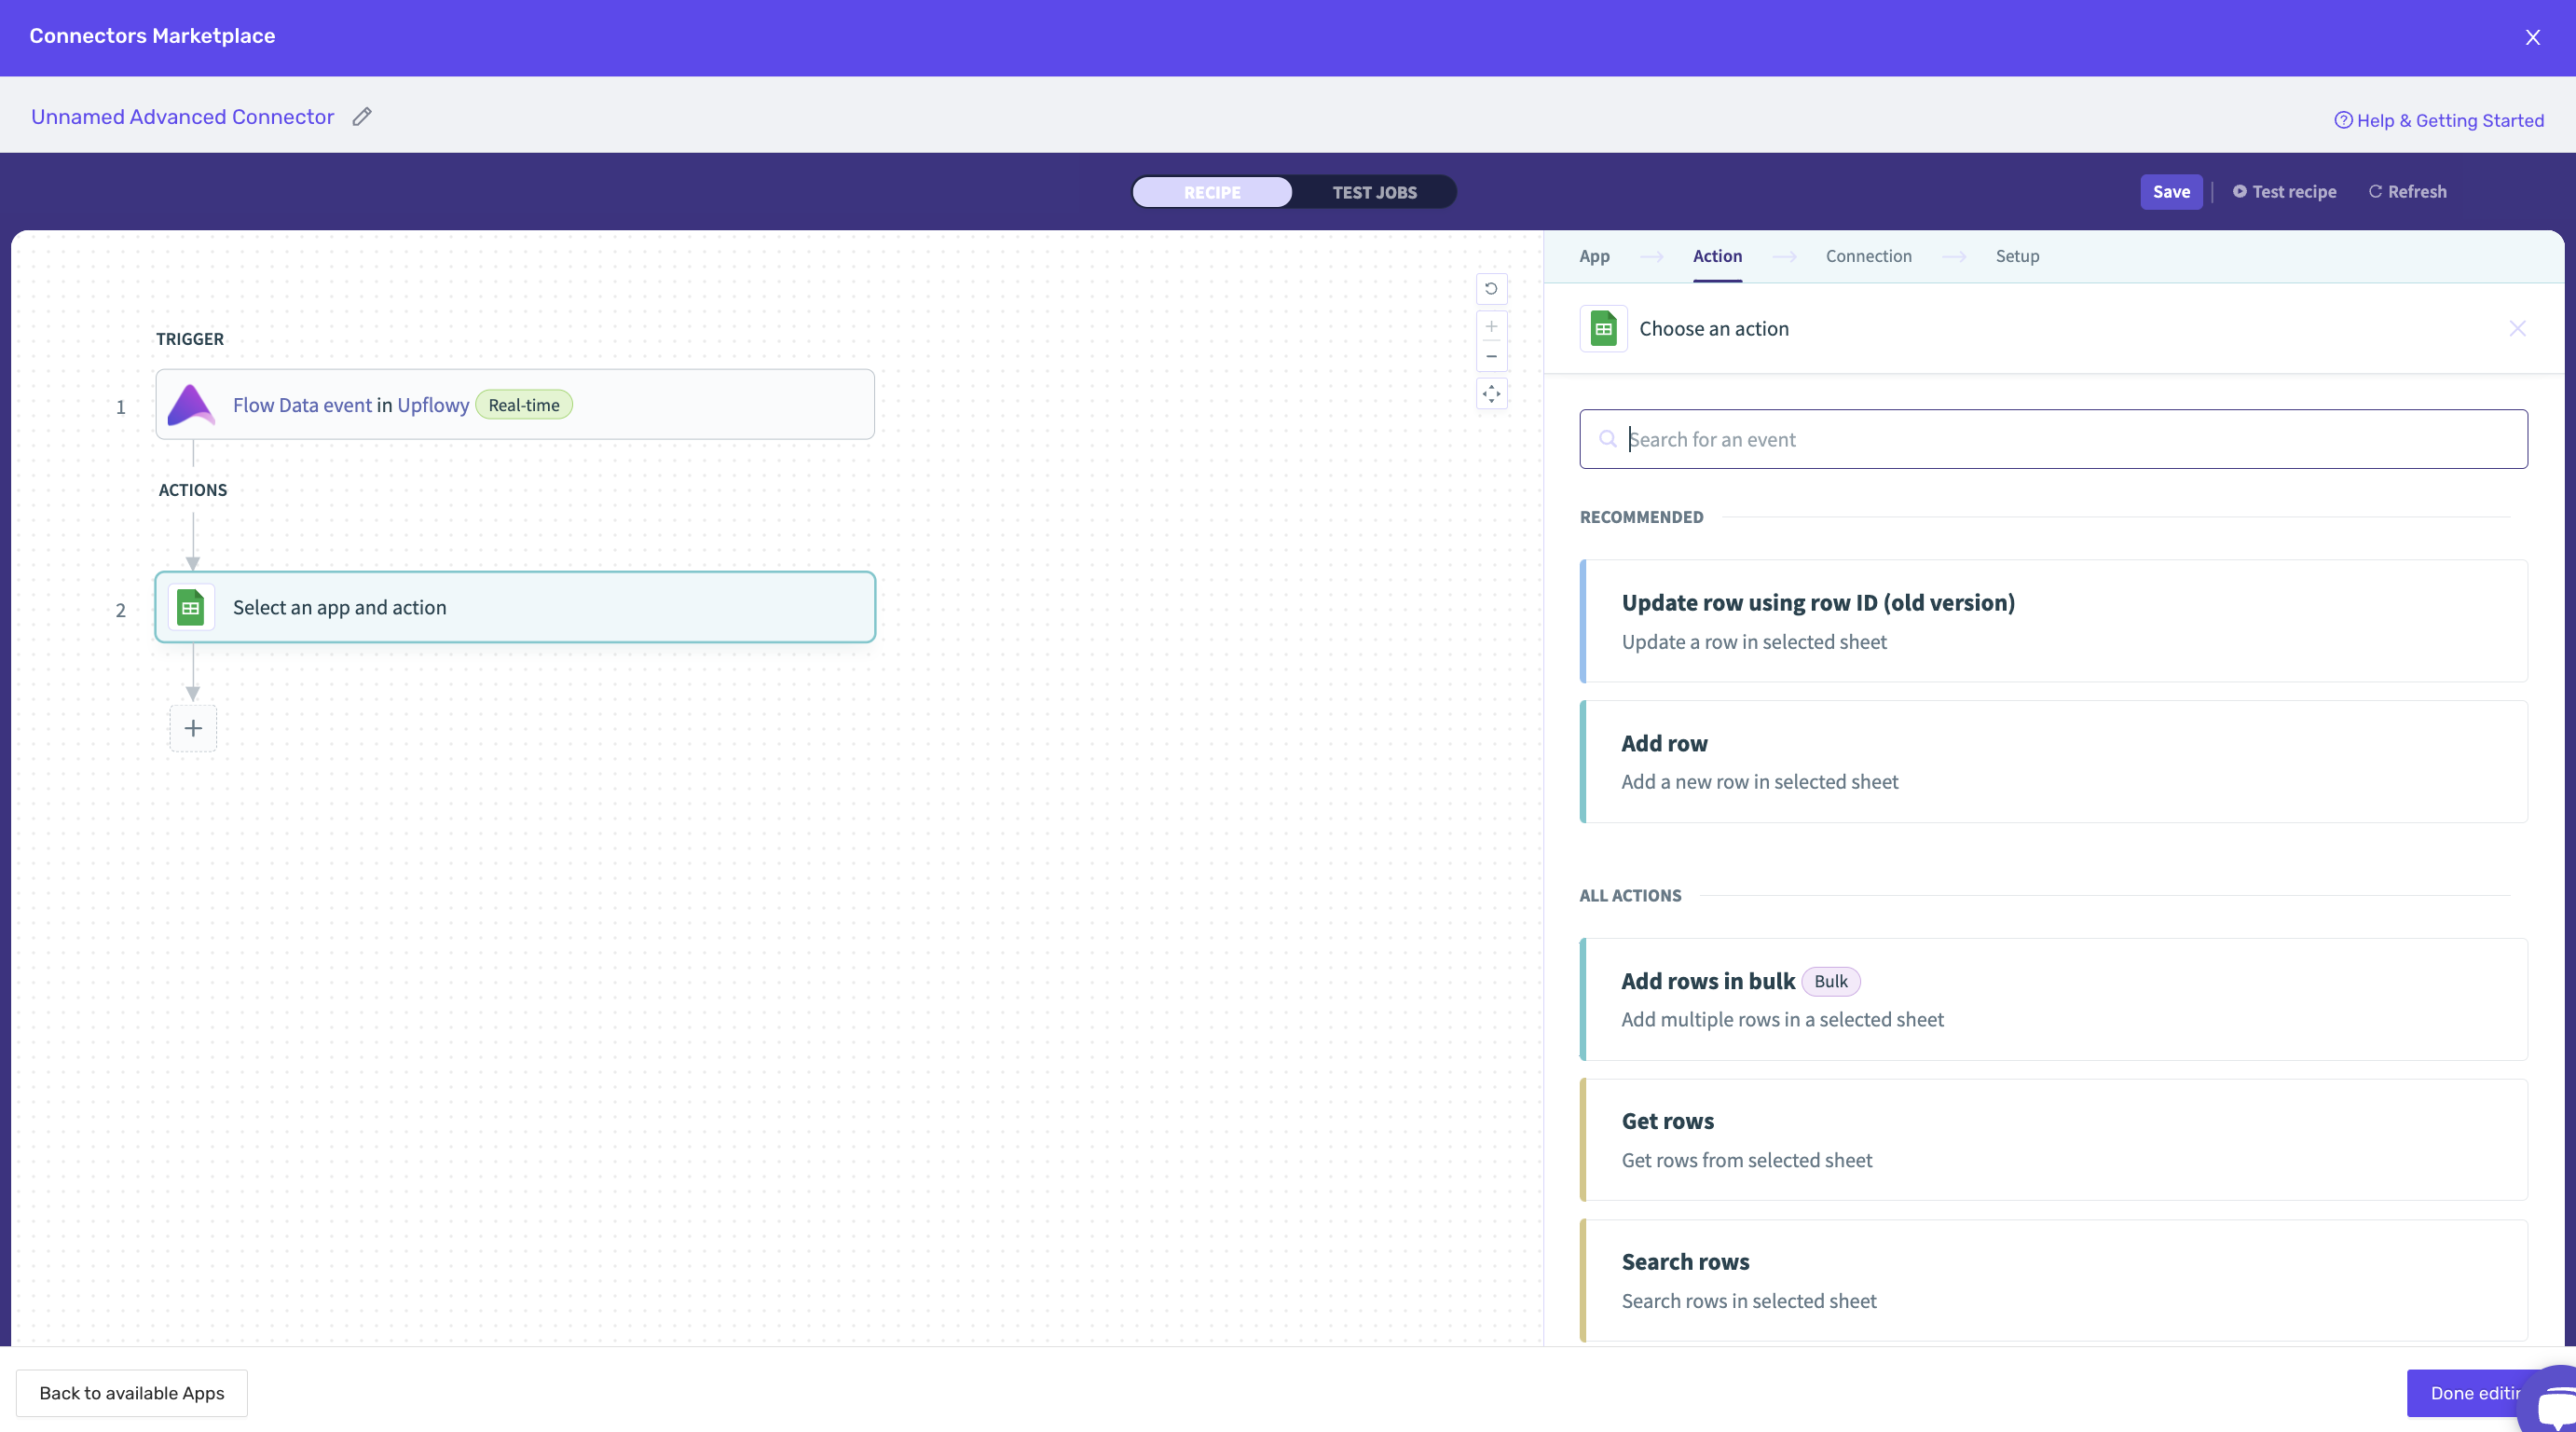
Select Action in the app. From here you will be able to search for the app you would like to connect.
Step two: Choose an action
Select what you want to happen in the app when a user completes a step or flow.
Step three: Connection
Log into the app with your account.
Step four: Setup
Now, all you need to do is customize the settings to achieve the goal you are looking for. This will depend on your specific needs.
Add a new record to a sheet
As a specific use case, let's see how you can add a new record to a Google Sheet file.
Step one: Create or open a file
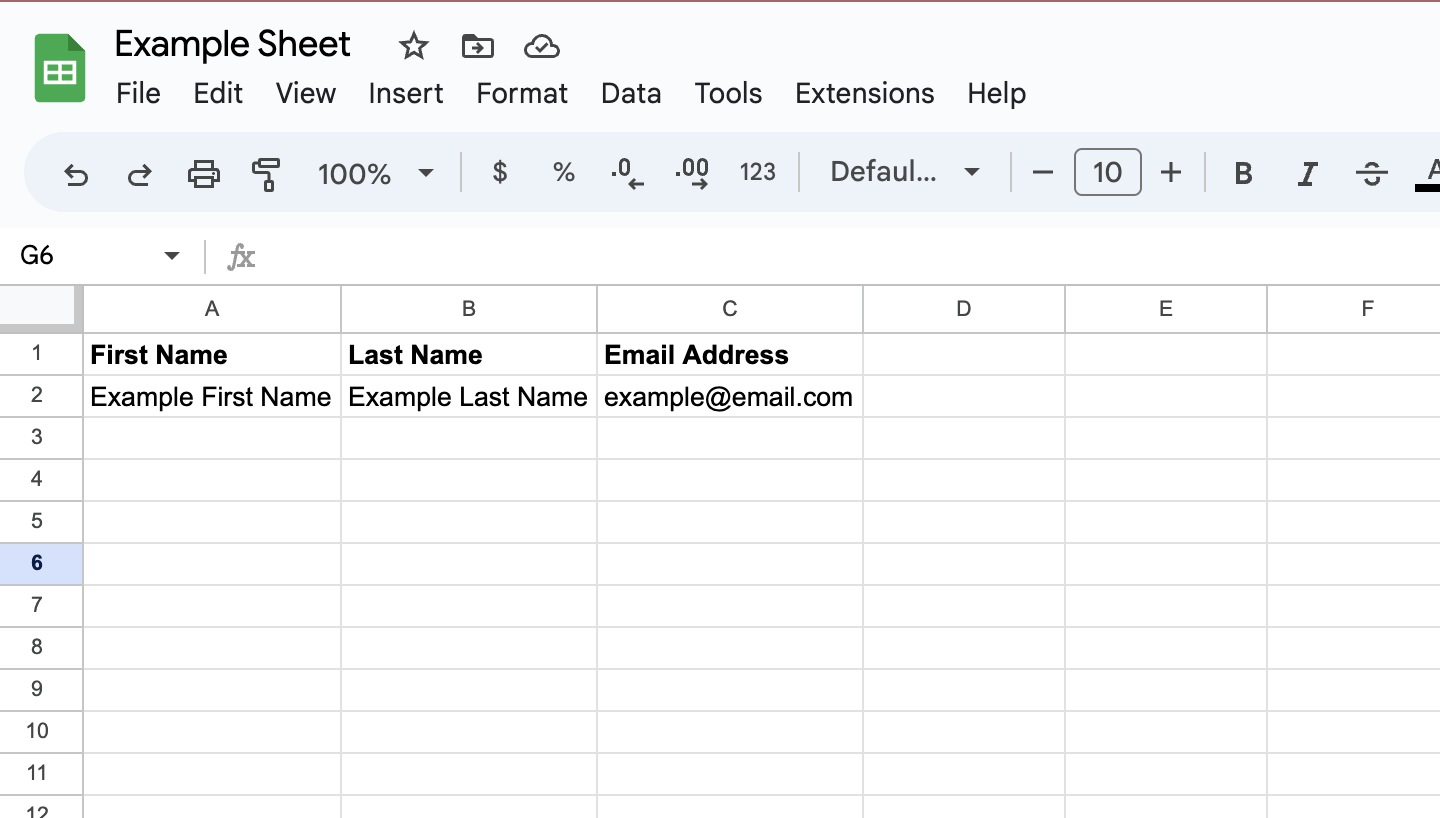
First, you will need a Google Sheets file where you have editor access with the account you have connected above. It can be a file you have been using previously or a new one. Make sure that the file has a header row, and at least one line of data - this is what the system is going to use to parse your information.
Step two: Create your flow, and add an advanced connector
Create and customize your flow, and for the step, you would like to add the connection, add an advanced connector (see above). Connect your account as it's been explained in the first section.
Step three: Add a row
To add a new row at the bottom of your sheet, select the "add a row" option from among the app actions. Connect or confirm your Google account on the "connect" tab, then continue with the setup of the action.
Select your drive and the worksheet you have previously set up. Once you do this, if you scroll down a bit, you will see the names of your columns appearing among the settings:
Now, all you need to do is select the data pills sent through Upflowy, and assign them to the correct column:
And that's it! Hit save, turn on your data connection, and from now on, new entries will be automatically logged to your Google Sheets file.
Search for and update rows in a sheet
Similar to adding a new row, you can also search among previous records, and update already existing rows as well. For this, all you need to do is follow the steps above, but for the action, select either "search a row" or "update a row".
An alternative way to connect: Zapier
To integrate your Upflowy flow with Zapier, it's recommended that you have a flow ready to be published with all input IDs correctly named.
Sending information to Google Sheets through Zapier is a three-step process:
- Creating a row of data (for the data submitted in the first step)
- Find an existing row in an existing spreadsheet (to update data)
- Updating that row of data (for the data submitted in subsequent steps)
Let's start integrating!
How to create a row of data in Google Sheets
When you log in to Zapier, you'll see the below prompt asking you what two platforms you would like to connect to:

Ensure that the prompt on the left is "Webhooks by Zapier" and the prompt on the right is Google Sheets.
A second line will prompt you to enter what action you would like upon data submitted through your upflowy form. Select "Catch hook" on the left and "Create Spreadsheet Row" on the right:

Then, click on "Try It". You will then see the below page:

Copy the custom webhook URL that Zapier generated:

Take this custom webhook URL, and return to your upflowy flow. Click on the "Connectors" tab in the left-hand toolbox, and all of the steps should appear:
Open up the steps, and paste in the webhook URL into your first step only.
Save this step. The exclamation logo in the corner should change to a tick, and the warning message should disappear:
Now, in Zapier, you will see that the next step is "Test Trigger":

To do this, go to the preview of your upflowy flow, and enter information for the first step only. This is to send test data to Zapier:

Once complete, go back to Zapier and click "Test trigger". If the webhooks are set up correctly, the following page should appear:

Press continue. Next, you'll have to set up your google sheet. Sign in to Google Sheets and click "Continue":

Now, let's set up the Google Sheets correctly.
From upflowy, you will be able to get the following bits of metadata alongside the information in your flow:
- UserID
- PageID
- UserIP
- Submitted at (Time)
- Initial (Which step the user started from)
In a new spreadsheet, add the names of all information you want in the first row. We would recommend creating a header for this line.

In Zapier, add in a pathway to direct to your Google Sheet:

After these are selected, you will see all the names in the first line of your spreadsheet appear. Simply click on each of them, and assign the value to them submitted through the test data.

Once you have assigned a value to every column, click "Continue". Next, Zapier will send a test to your CRM to ensure that you correctly set up your information. Click "Test and Continue":

If successful, you'll receive the below message - and you'll see the


Congratulations! Turn on the Zap. Now let's move on to part 2 - updating the row to include information from the next steps.
How to find the rows of data (and then update them) in your Google Sheets
To find a row (to update), you need to:
- Set up Zapier to update your current spreadsheet with the correct information
- Set up extra columns to allocate any new data
Add any new columns of information submitted through your flow in your Google Sheets.

Select "Webhooks by Zapier" with Google Sheets. This time, select "Update Spreadsheet Row" instead of "Create New Row" and select "Try It":

Copy the URL given by Zapier, and then return to your upflowy flow to add the URL into the "Send Data" input to all other steps in your flow:


Click "Continue" in Zapier. Now, go to the preview and submit data for all steps in your flow.

Go back to Zapier, and click "Test Trigger". If set up successfully, the following message should appear:

Click Continue, and select the same spreadsheet as the previous Zapier integration for "Create New Spreadsheet". Click on "Row", select "Custom", and then click on "Add a search step".

Link the search step to the same spreadsheet. Select "UserID" for the Lookup Column, and assign the Lookup Value as "User ID".

Assign values to each input, apart from the new rows of information. We'll assign these soon!

Test the connection, and continue. Now, allocate the values to the new columns in your spreadsheet:

If successful, you should see the below message - and your Google Spreadsheets should have been updated with the relevant information:


Congratulations! Turn your Zap on, and enjoy the data flowing through your spreadsheet!